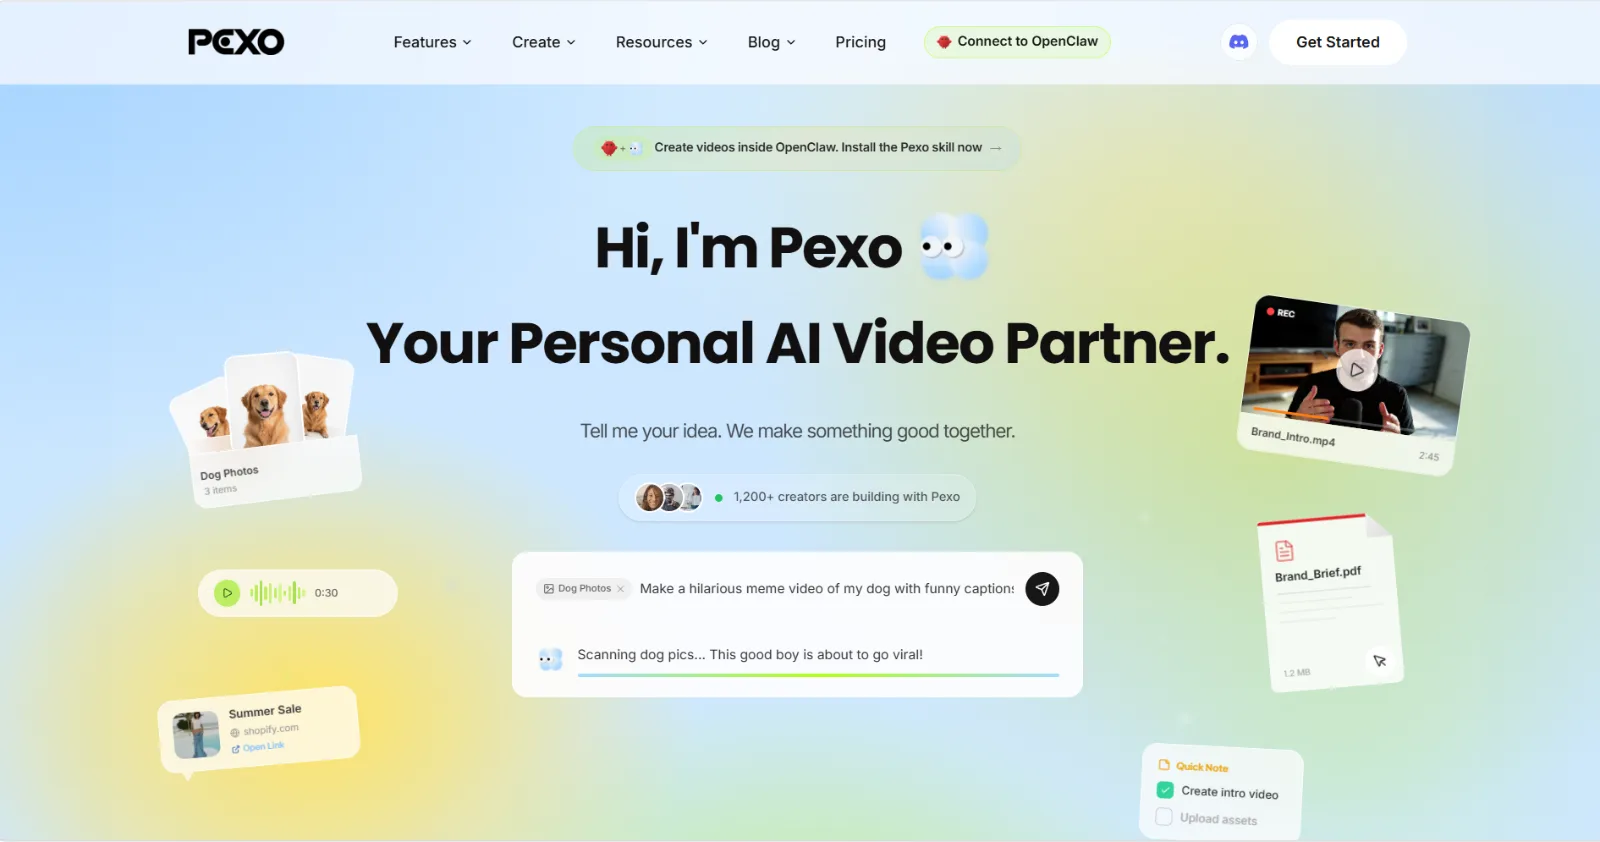
For two years I edited videos the hard way, dragging clips across a timeline and nudging keyframes one pixel at a time. Now I do most of it inside Pexo by describing what I want and what to change, and a finished clip comes back in minutes. No menus. Just one conversation. That single shift, from operating an editor to directing a partner, is the real story behind every tip below.
These are the AI video editing tips and the exact four-step workflow I lean on, plus the mistakes that cost me time when I started. The whole thing takes about 10 minutes once you know the rhythm. Want to follow along? Open Pexo in another tab and try it as you read.
 Directing a video in Pexo by describing the changes instead of dragging clips on a timeline.
What Is AI Video Editing in 2026 (Really)?
For years, "AI video editing" meant a normal editor with a few smart features bolted on: auto-captions, background removal, a one-click highlight reel. You still drove the timeline. In 2026 there is a second, faster meaning. You describe the video and the changes you want in plain language, and an AI video partner like Pexo plans the shots, picks the model, and hands you a finished cut.
So there are really two paths. The timeline path is for fixing footage you already shot. The conversational path is for getting a finished video from an idea, a photo, a product URL, or a voice note, without any editing skills. This guide is about the second path, because it is where most of the time savings live. If you want to see it work end to end, start a video in Pexo and describe the first thing that comes to mind.
What You Need Before You Start
You need surprisingly little. Here is the full checklist:
- An idea or a one-line brief. A single sentence is enough to begin.
- One input. Pexo accepts 4 kinds: text, a still image, a product URL, or an audio clip. Note that existing video is not one of them, which matters later.
- A target format. Decide the platform up front: vertical 9:16 for TikTok and Reels, square 1:1 for feed, or wide 16:9 for YouTube.
- A Pexo account and about 10 minutes.
Do not have a usable image? You can generate the still right inside Pexo with text to image, then bring it into the image to video flow without leaving the app. That keeps the whole job in one place instead of bouncing between 3 tools.
 Pexo accepts four starting points: text, image, URL, or audio. Existing footage is not an input.
AI Video Editing with Pexo: The 4-Step Conversational Workflow
This is the workflow I run almost every day. Four steps, one conversation, start to finish.
Step 1: Start With Whatever You Have
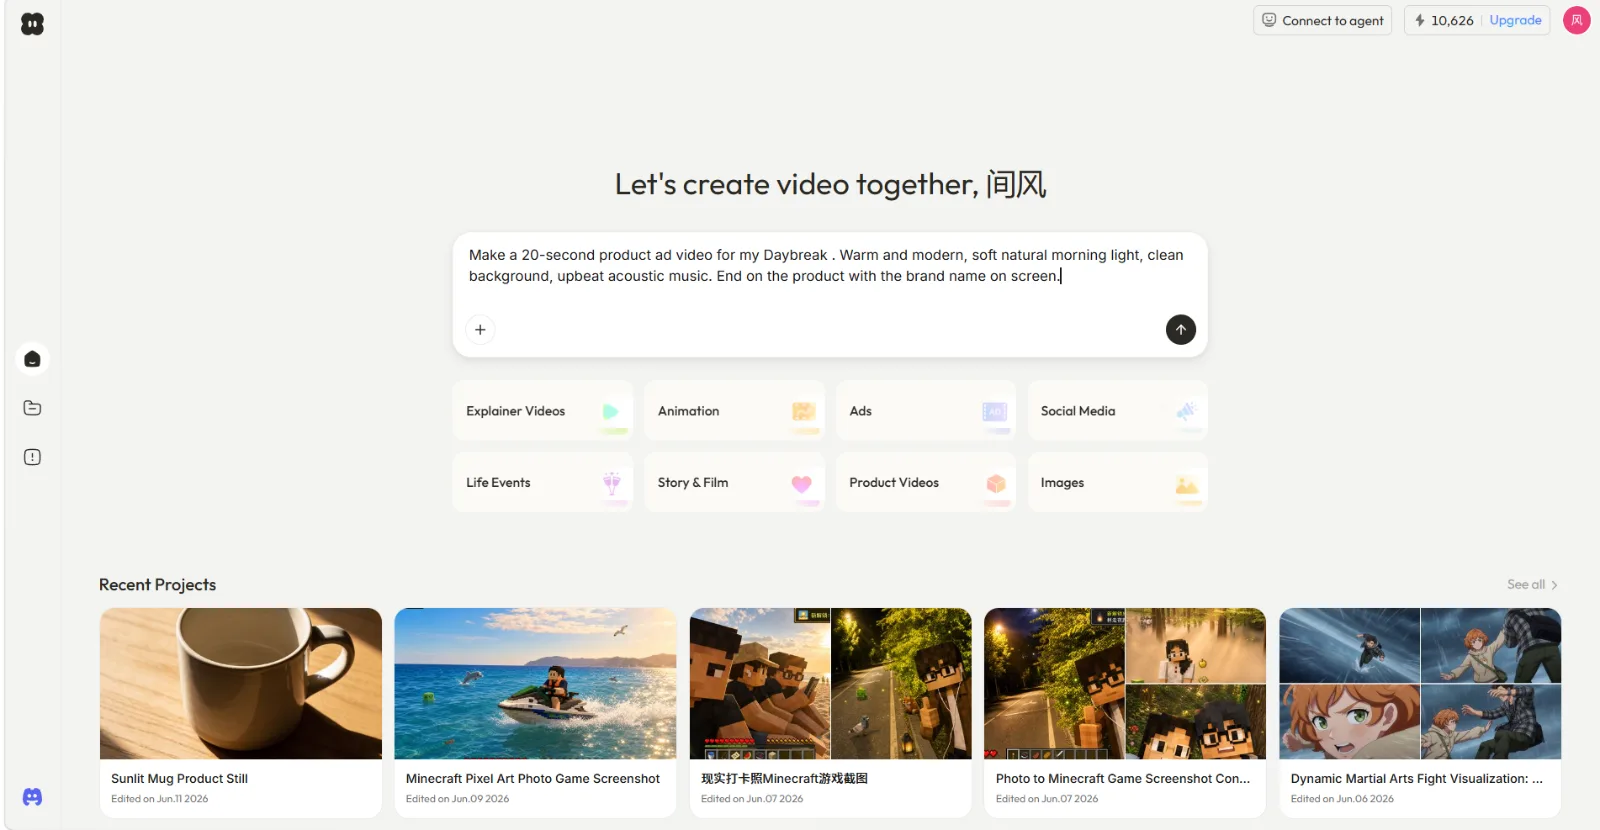
Open Pexo and drop in your input. If all you have is an idea, type one sentence. If you are making a product ad, attach the product photo. If you found a great landing page, paste the URL. Pexo reads your intent from any of the 4 input types and starts building from there, so you are never staring at a blank prompt box. Turning a single still into motion is its own small superpower, and the image to video flow handles it without a single keyframe.
Step 2: Describe the Video, Not a Prompt
Say what you want the way you would text a friend: "15-second TikTok ad for my skincare serum, upbeat, soft morning light." There is no prompt syntax to learn and nothing to get "right." Pexo picks up on what you actually mean and even suggests directions you did not think of. This is the heart of the workflow, so tell Pexo what you want in your own words and let it think with you.
 Describing the video in one sentence instead of writing a prompt or building a shot list by hand.
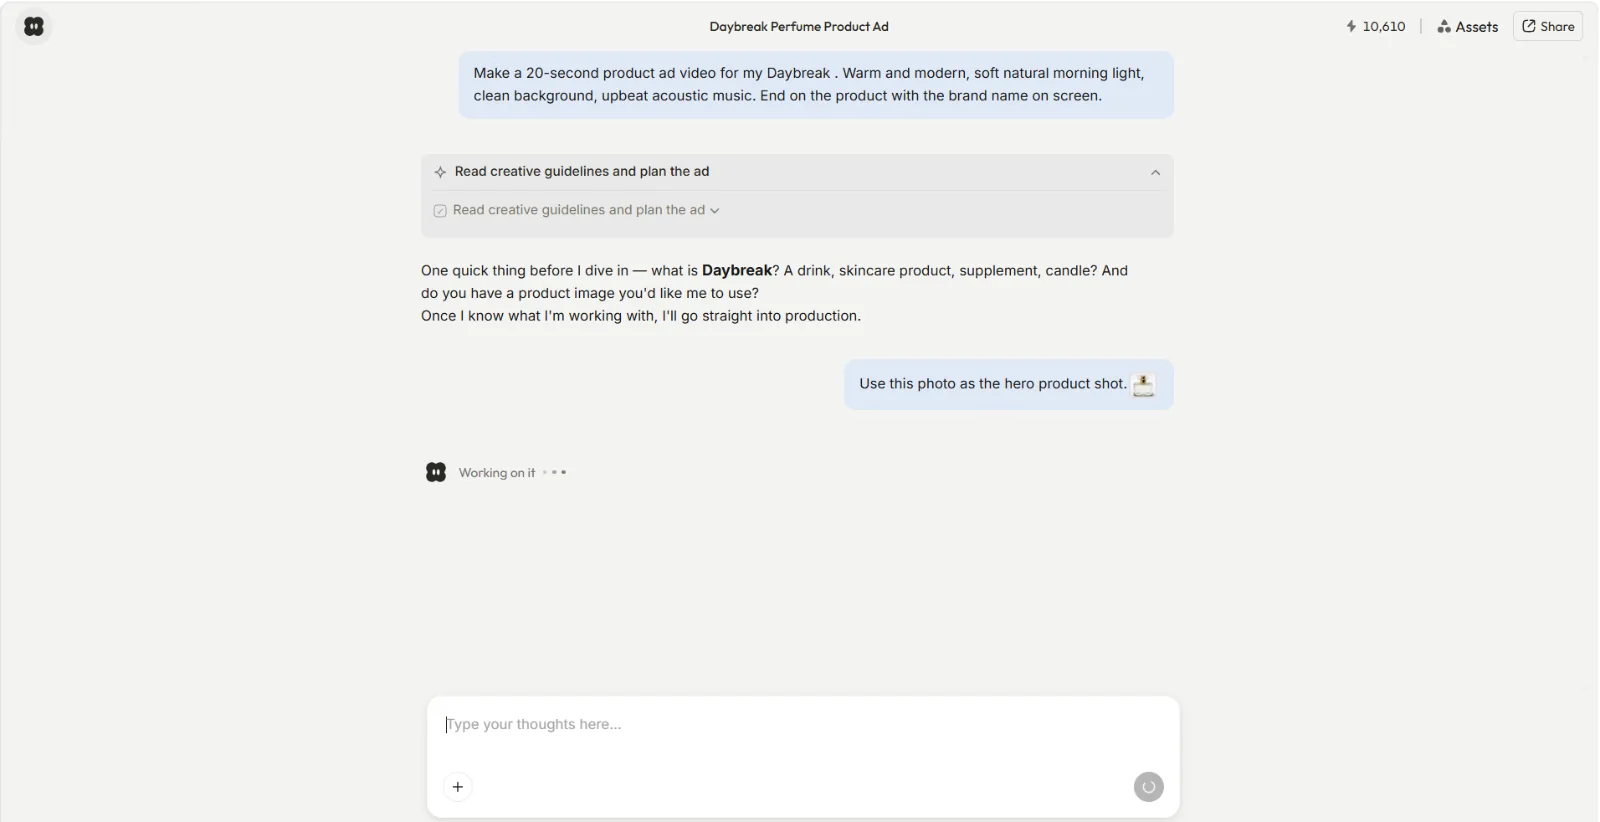
Step 3: Review the Preview and Refine by Describing Changes
Before any full render, Pexo shows you a plan and a quick preview, then offers directions you can take from there. This is the step that replaces traditional editing. Instead of scrubbing a timeline, you point at what is off and say how to fix it: "make the opening punchier, swap the music for something calmer, cut the third shot." Pexo applies the change and shows you the result, and you repeat until it feels right. Behind the scenes it works with the world's leading models, including Seedance, Sora, Kling, and more, and picks the right one for your scene so you never compare models yourself.
 Pexo shows a preview plus the directions you can take, so you redirect by describing changes instead of editing a timeline.
Step 4: Pick the Aspect Ratio and Ship
Choose your format (9:16, 1:1, or 16:9) and Pexo delivers a complete video with transitions, soundtrack, and pacing already handled. Download it or post it straight to your platform. For feed-ready dimensions and quick variants, the social media video flow is the fastest finish line.
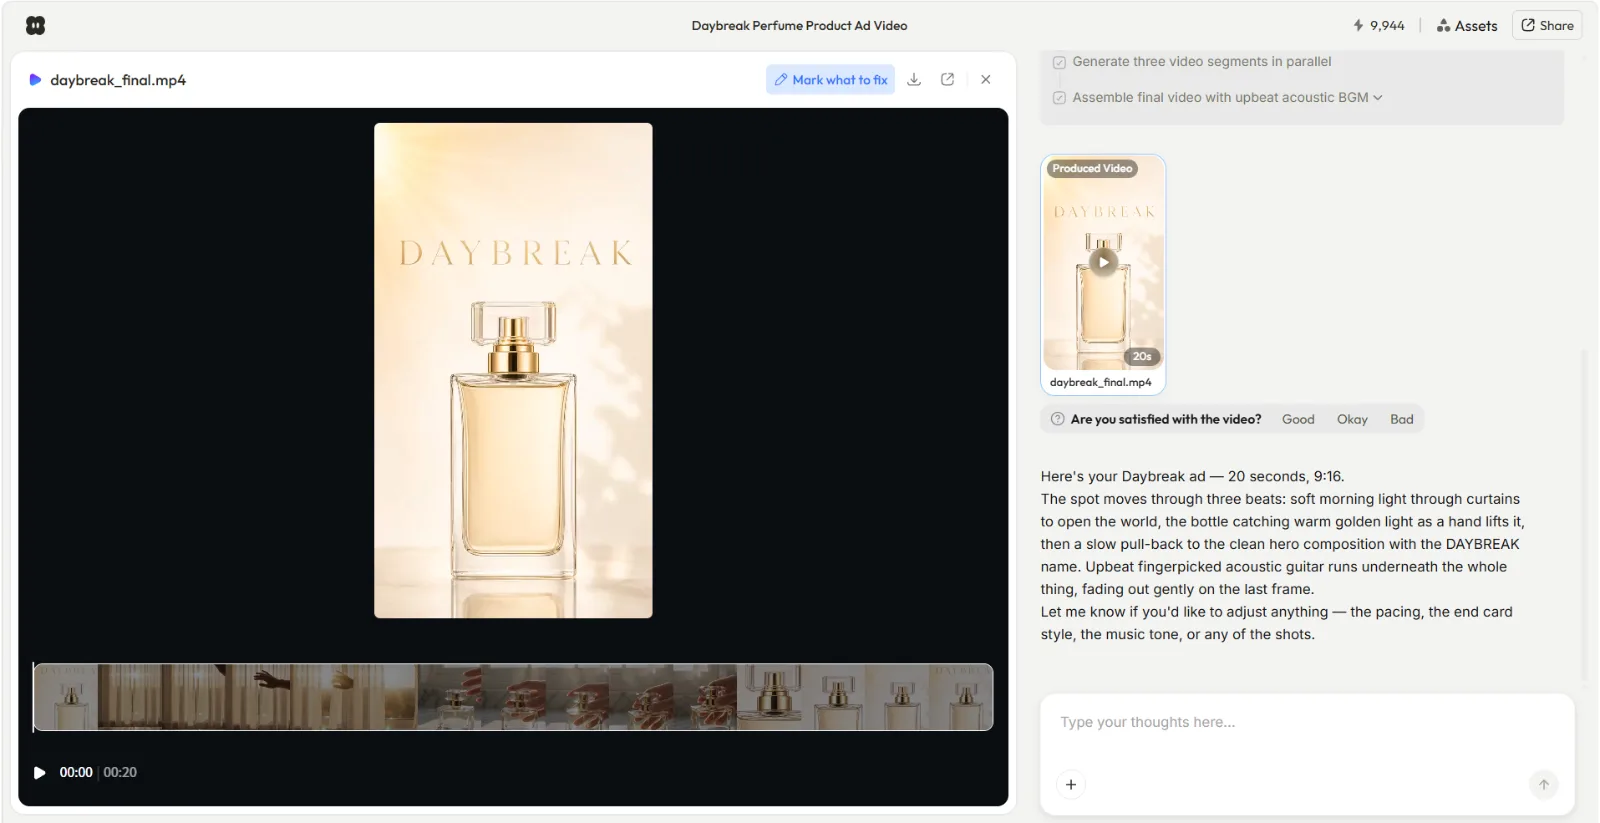 A finished 9:16 product ad ready to export, with transitions and soundtrack already in place.
Common AI Video Editing Mistakes to Avoid
A few habits cost me real time early on. Skip them:
- Over-specifying on the first try. Give the gist in 1 sentence, then refine after the preview. A wall of detail up front just locks in the wrong direction.
- Trying to upload footage to "edit" it. Pexo generates from an idea or an asset; it does not trim raw clips you already shot. Bring the input, not the cut.
- Skipping the preview. Redirecting at the plan stage costs seconds. Redoing a finished render costs minutes.
- Vague feedback like "make it better." Name the shot and the change so Pexo can act on it.
- Choosing the aspect ratio last. Decide the platform first so the framing is right from shot one.
Pro Tips for Faster, Better Results
These are the small moves that consistently lift quality:
- Lead with platform and length. "30-second Reel" tells Pexo the format, pacing, and energy in 3 words.
- Give one reference vibe, not five. "Calm, lo-fi, soft colors" beats a paragraph of contradictory adjectives.
- Use a real product photo for ads, or generate a clean one in Pexo first if you do not have one.
- Iterate in small passes. Change 1 thing, look, change the next. It is faster than rewriting the whole brief.
- Reuse a winner as a template. When a video lands, describe the variant ("same style, new product") instead of starting over.
When NOT to Use AI Video Editing This Way
Honesty matters more than the pitch, so here is where this approach is the wrong tool. If you already shot footage and need frame-accurate trims, multi-track layering, precise caption timing on an existing clip, or color grading on real video, a conversational AI partner is not the right fit. Pexo creates from text, image, URL, and audio; it is not a timeline editor and will not cut the wedding video you filmed last weekend.
For that work, reach for a real editor. The conversational path wins when you are starting from an idea or a still and want a finished video without learning an editor, not when you are doing precision surgery on footage you already own. Knowing which job you have is the most useful AI video editing tip of all.
Other AI Video Editing Tools You Can Try
If your job is closer to the timeline path, these are worth a look:
- Runway pairs a timeline with AI features, so it suits people who want manual control plus generative extras.
- CapCut is a free editor with AI add-ons, handy for quickly cutting clips you already shot.
- Descript edits video by editing the transcript, which is great for talking-head and podcast footage.
Conclusion
The fastest AI video editing tip I can give you is counterintuitive: stop editing and start describing. When the work is creating a video from an idea, a photo, a URL, or a voice note, Pexo turns that into a finished, ready-to-post clip through one conversation, with no menus and no editing skills. Open Pexo and make your first video today, then describe one change and watch how fast directing beats operating.