A normal explainer video means stitching together four jobs: a script, a voiceover, animation or footage, and an editing timeline to glue it all into one clip. Pexo collapses that whole pipeline into a conversation. You describe the explainer you want in plain language, the way you'd brief a colleague, and Pexo plans it, builds it, and hands you a finished video you can refine by talking. No prompt syntax, no animation software, no editing.
This guide walks the full workflow in five steps, then covers the mistakes that quietly sink explainer videos, a few pro tips, and the other tools worth knowing about. By the end you'll be able to take a rough idea or a product page and turn it into a clear explainer without learning a single piece of motion-graphics software.
 With Pexo you start by telling it your idea in plain language, not by opening a timeline.
What You Need Before You Start
You need less than you think. The whole point of a conversational workflow is that the heavy prep (storyboarding, asset hunting, scene-by-scene planning) happens inside the chat instead of in your prep doc.
That said, two things make the result sharper. First, a clear sense of the one idea your explainer has to land: the single thing a viewer should understand by the end. Explainers fail when they try to explain five things at once. Second, any source material you already have. That can be a rough script or talking points, a product URL, or an image of the thing you're explaining. Pexo accepts text, a URL, an image, or audio as a starting point, so you can hand it whatever you've got and shape the rest in conversation. If you only have an idea in your head, that's enough too. You can describe it and let Pexo draft the structure with you.
How to Make an Explainer Video With Pexo (Step by Step)
Here's the part that replaces the script-voiceover-animate-edit grind. Each step is a step inside Pexo, and the only skill required is being able to say what you want. You're not operating a tool here. You're directing.
Step 1: Open Pexo and Describe Your Explainer
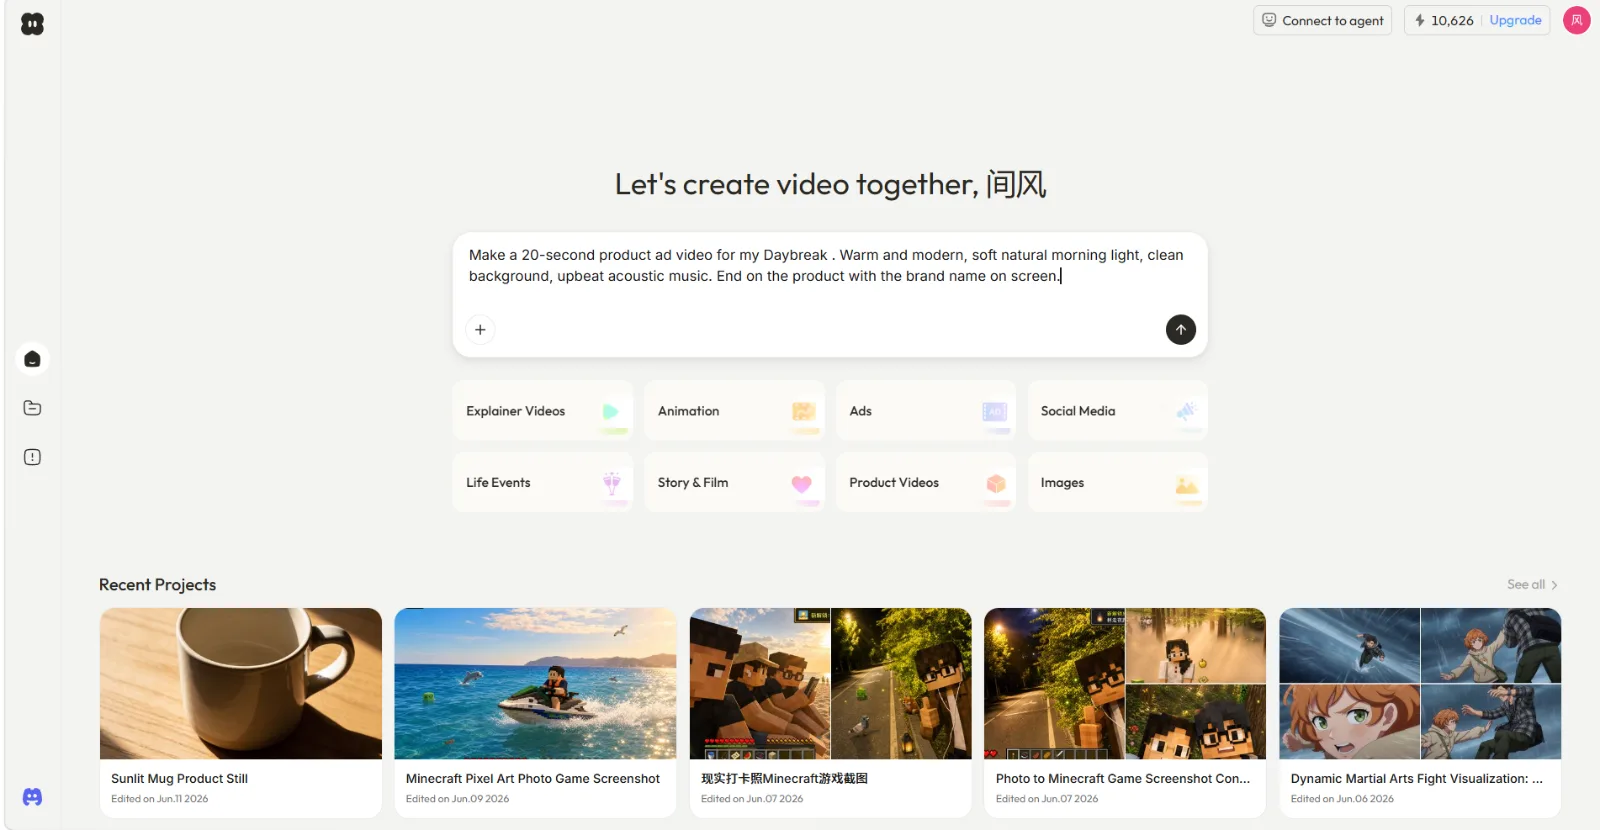
Open Pexo and start a new project. Instead of a blank timeline or a prompt box, you get a chat that asks what you want to make. Type your explainer idea in plain language, including who it's for, how long it should be, the tone, and the one thing it has to teach. Something like "Make a 60-second explainer for how our scheduling app works, aimed at first-time users, friendly and clear." You can also pick a starting lane like Explainer Videos from the suggestions if you'd rather begin from a template of intent. There's no right way to phrase it, so don't overthink the wording.
 Pexo opens with a describe box, not a timeline. You say what you want in one line and pick a lane like Explainer Videos.
Step 2: Add Your Source Material
Next, give Pexo something to work from. If you wrote talking points or a full script, paste them in and Pexo's script-to-video maps your words to scenes. If your explainer is about a product, drop in the product link and Pexo's URL-to-video reads the page to pull in the right context. If you have a screenshot, a product photo, or a diagram, attach it in the same chat and tell Pexo how to use it. You add the source the way you'd send a file to a teammate, then say what it's for.
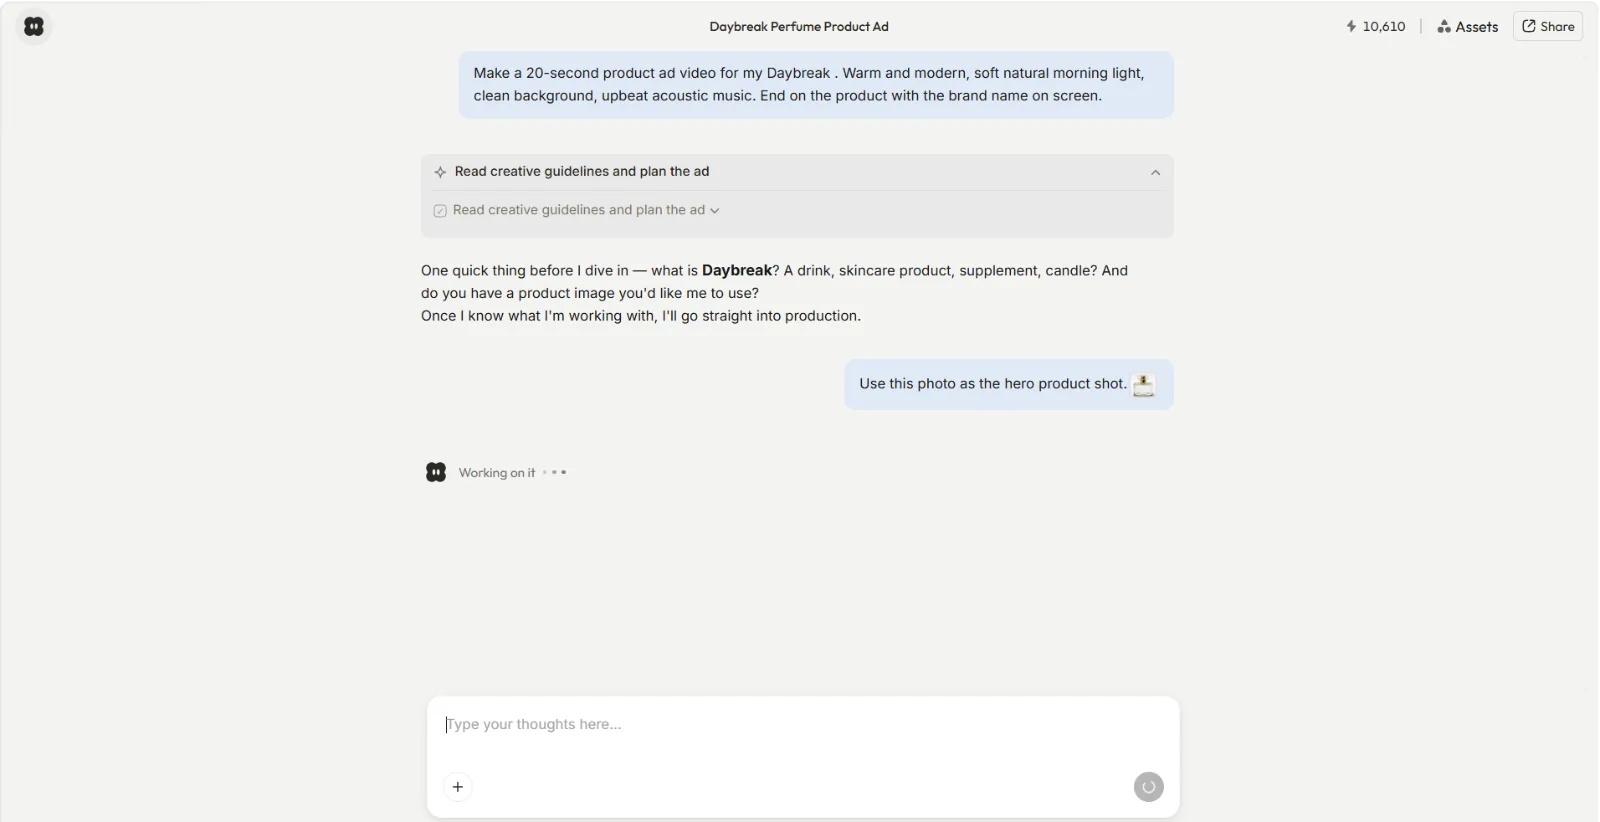 Add your script, a URL, or an image right in the chat, then tell Pexo what it is. Here a product photo is handed over as the hero shot.
Step 3: Review Pexo's Plan and Preview
Before it builds the whole thing, Pexo shows its work. It reads the brief, lays out a plan for the explainer, and produces a quick preview so you can see the direction. This is your checkpoint. Read the plan, watch the preview, and confirm the structure makes sense for the idea you're explaining. Because Pexo works with leading models like Seedance, Sora, Kling AI, and more and routes to the right one for each shot, you don't choose a model or tune settings. You just judge the result and decide whether it's heading where you want.
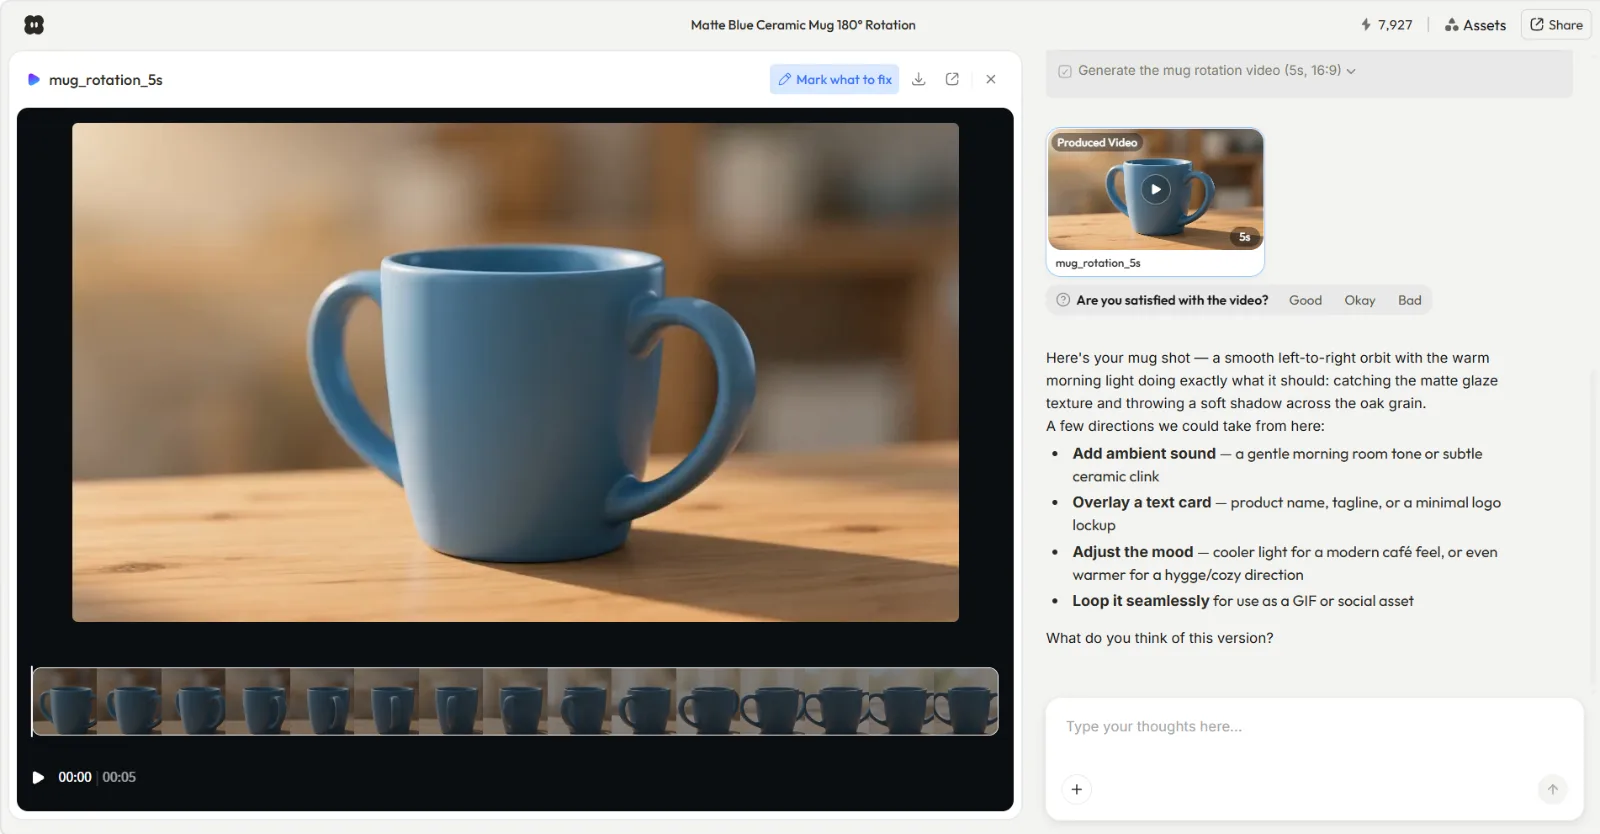 Pexo previews the video and explains what it built, so you can redirect before committing to the full render.
Step 4: Refine by Talking, Not Editing
This is where a conversational workflow pulls ahead of an editing timeline. To change something, you describe the change instead of hunting through menus. Tell Pexo to slow the pacing, swap the music for something warmer, tighten the intro, add a text card with your key takeaway, or adjust the tone of the narration. Point at what you mean and say what to change. Pexo reworks that piece and shows you the new version. You can loop as many times as the idea needs, and you can jump back to an earlier section without starting over.
 Refining is a sentence, not a timeline edit. Say what to change and Pexo reworks that part and re-renders.
Step 5: Export and Share
When the explainer looks right, Pexo finishes the job into a complete, ready-to-post video with transitions, soundtrack, and pacing already handled. Export it in the aspect ratio that fits where it's going, tall for Reels and Shorts, square for feeds, wide for a website or a help center. From here you share it straight out or download it for upload elsewhere. There's no separate render-and-stitch pass to babysit, because the finished clip is what you've been shaping the whole time.
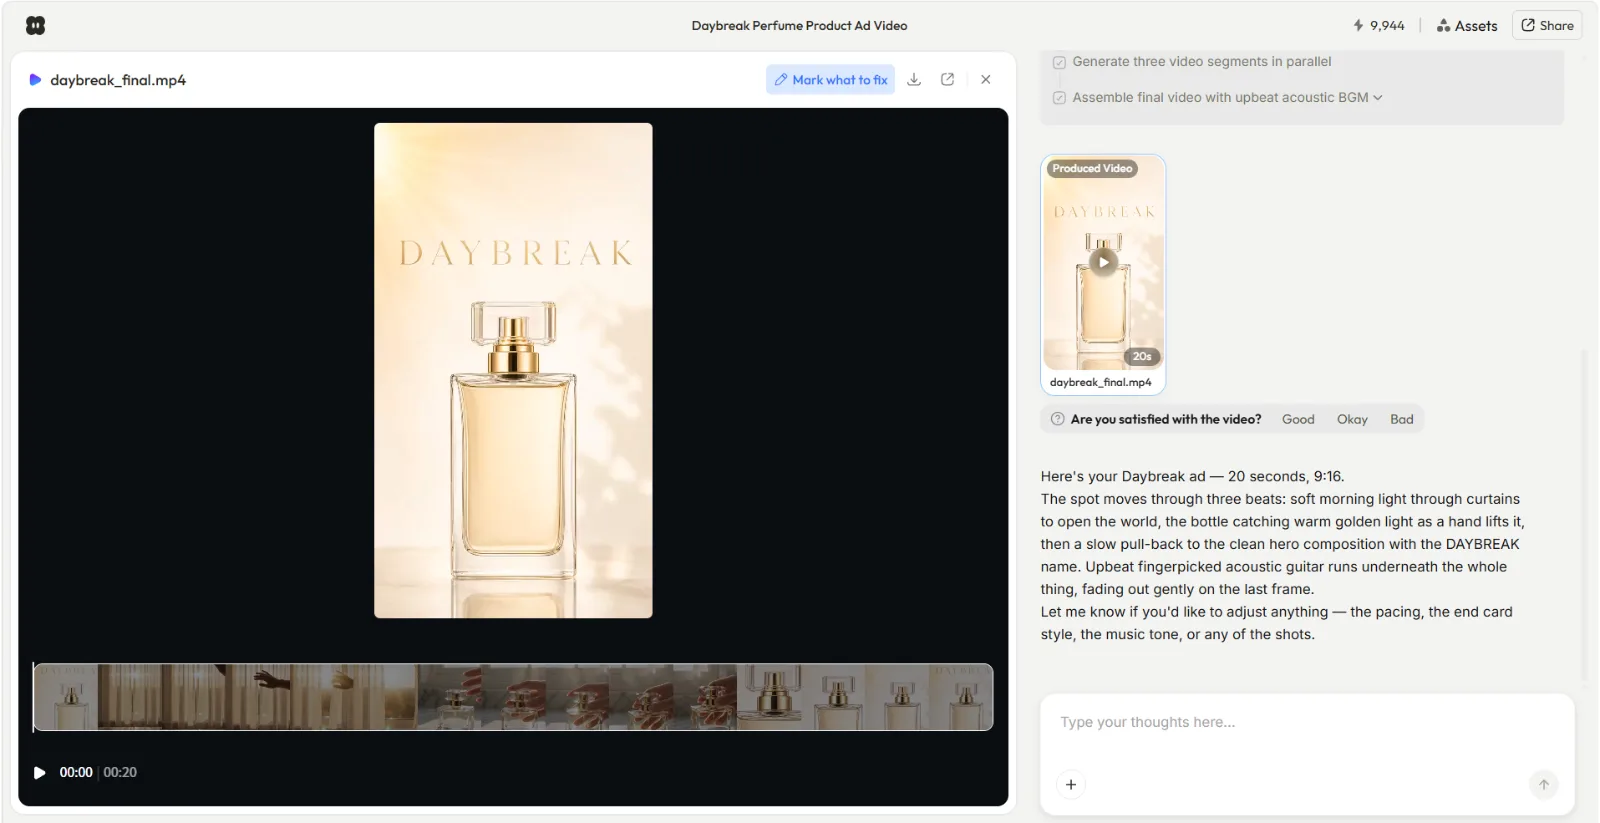 The finished video, ready to share or download. Pexo handles transitions, soundtrack, and pacing as part of finishing the job.
Common Mistakes to Avoid
Even with the workflow handled, a few habits will weaken an explainer. These are the ones worth watching for.
- Explaining too much. The most common failure is cramming three ideas into one video. Decide the single thing a viewer must understand, and tell Pexo to keep everything in service of it. A focused 45-second explainer beats a rambling two-minute one.
- Briefing too vaguely. "Make it engaging" gives Pexo nothing to aim at. Name the audience, the tone, and the takeaway. The more concretely you describe the result you want, the closer the first preview lands.
- Skipping the preview checkpoint. Step 3 exists so you can redirect early. Approving the plan without reading it, then asking for big structural changes after the full build, costs you iterations you didn't need to spend.
- Forgetting where it will play. An explainer for a TikTok feed and one for a website hero need different lengths and aspect ratios. Tell Pexo the destination up front so the pacing and framing fit from the start.
Pro Tips for Sharper Explainer Videos
Once you've made a couple, these push the quality up without adding work.
- Write the first line like a hook, not a title. Tell Pexo to open on the problem your viewer feels, not on your product name. Attention is won in the first three seconds.
- Let the narration carry the logic, the visuals carry the feeling. Ask Pexo to keep on-screen text short and let the spoken track do the explaining. Describe the tone of narration you want (calm, upbeat, plain-spoken) and Pexo matches it.
- Reuse a winner as a template. When an explainer lands, describe the next one in the same shape ("same pacing and structure as the last, new topic"). Pexo keeps the formula and swaps the content.
- Match the export to the platform. Render a tall cut for Shorts and Reels and a wide cut for your site or help center in the same session, instead of resizing later.
What Else Can You Use
Pexo is built for going from an idea to a finished explainer by talking, but it's not the only route, and the right tool depends on the kind of explainer you want.
- Powtoon: a template and character based animation maker. A good fit when you want a cartoon-style animated explainer and are comfortable assembling scenes on a canvas yourself.
- VideoScribe: a dedicated whiteboard-animation tool. Suited to teaching and educational explainers where the hand-drawn, draw-as-you-talk style is the point.
- Canva: a template-driven editor. Works well if you already live in Canva and want to drag explainer templates onto a familiar timeline.
Conclusion
Explainer videos used to be a four-tool project. With a conversational workflow, the script, voiceover, visuals, and pacing all come together in one chat, and your job shifts from operating software to directing a result. Describe the one idea your video has to land, hand over whatever source you have, review the preview, and refine by talking until it's right. When you're ready to try it on your own idea, you can make an explainer video with Pexo and have something shareable the same day.