Pika is one of the most popular ways to turn a single sentence or one still image into a short, shareable AI video, and this guide walks the whole workflow from a blank screen to a finished clip. It runs on the current Pika 2.5 model, so the steps below match what you will actually see at pika.art today.
If you already know you would rather not wrestle with a prompt box at all, skip to the last section, where you can make the same kind of video just by describing it to Pexo, your AI video partner. But Pika is a capable generator in its own right, so let's start by making a video in it properly.
 Pexo's conversational home screen, the no-prompt route covered at the end of this guide.
What You Need Before You Start
You do not need any editing experience to follow along, but a few things make the process smoother:
- A Pika account. Sign up at pika.art with an email or Google login. The free plan includes a monthly credit allowance, which is enough to test prompts and make a few short clips before you decide on a paid tier.
- A clear idea or a starting image. Pika works from either a text description (text-to-video) or a photo you upload (image-to-video). Have your concept or your image ready.
- Clean source material. If you are animating a photo, sharpen a blurry one with a tool like Remini or cut the background with Remove.bg first. Pika animates what you give it, so a clean input means a cleaner result.
How to Use Pika: Step-by-Step
The core Pika workflow is five steps. Each one happens inside the web app, so there is nothing to install.
Step 1: Sign In and Open the Prompt Box
Go to pika.art and sign in. You land on the Explore screen, with a prompt box at the bottom that reads "Describe your story" and a toolbar of tools and settings beneath it. There is no separate mode to pick: type a description to make a video from text, or click the image icon inside the box to upload a still and animate it. Both start from the same box.
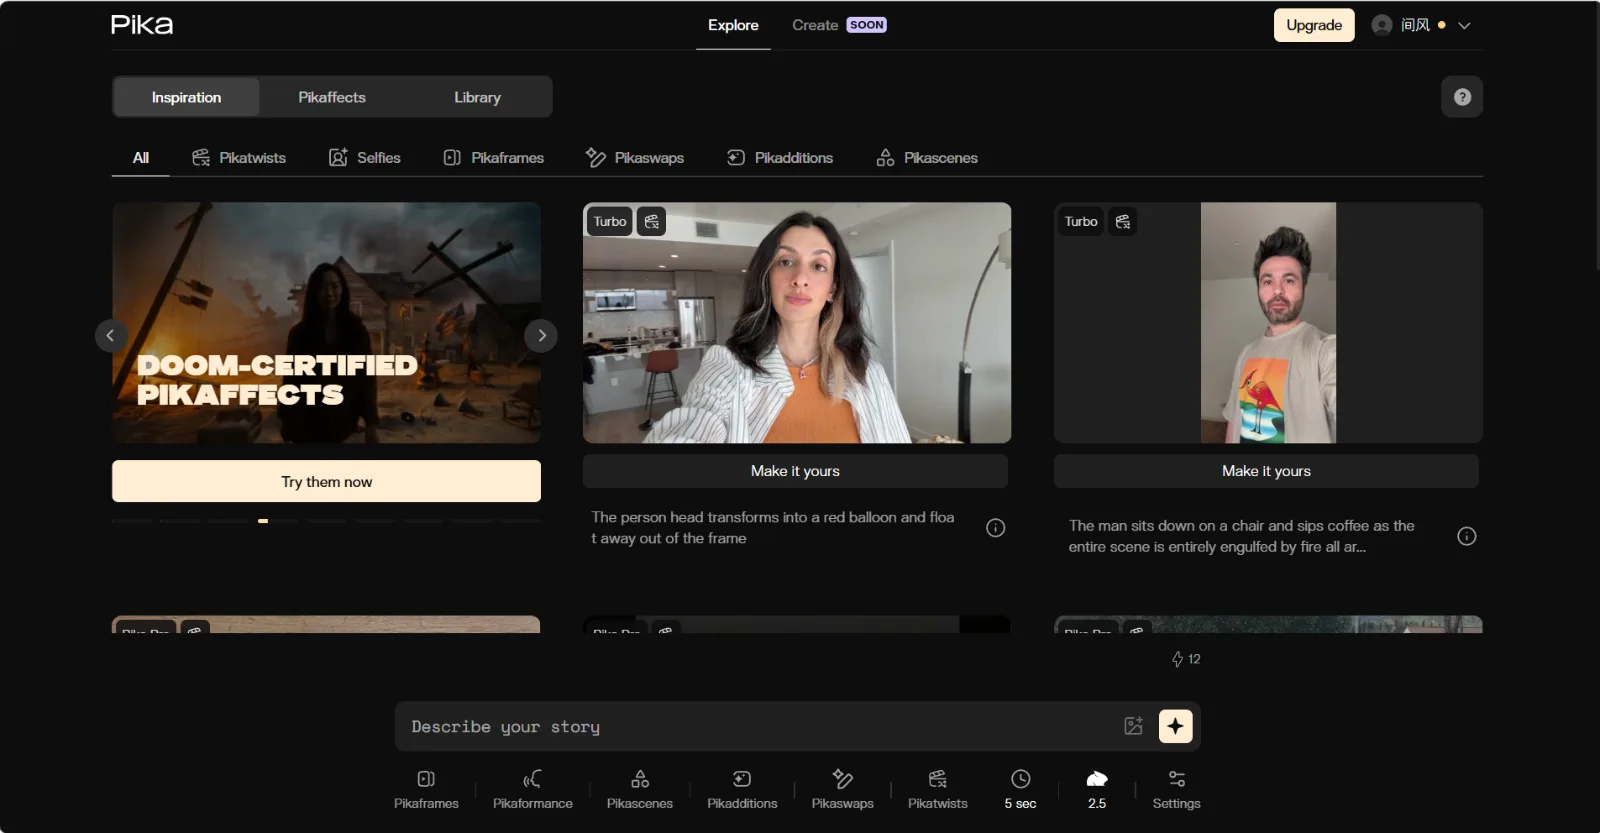 Pika opens on the Explore screen with a single Describe your story box and a toolbar beneath it.
Step 2: Describe Your Shot
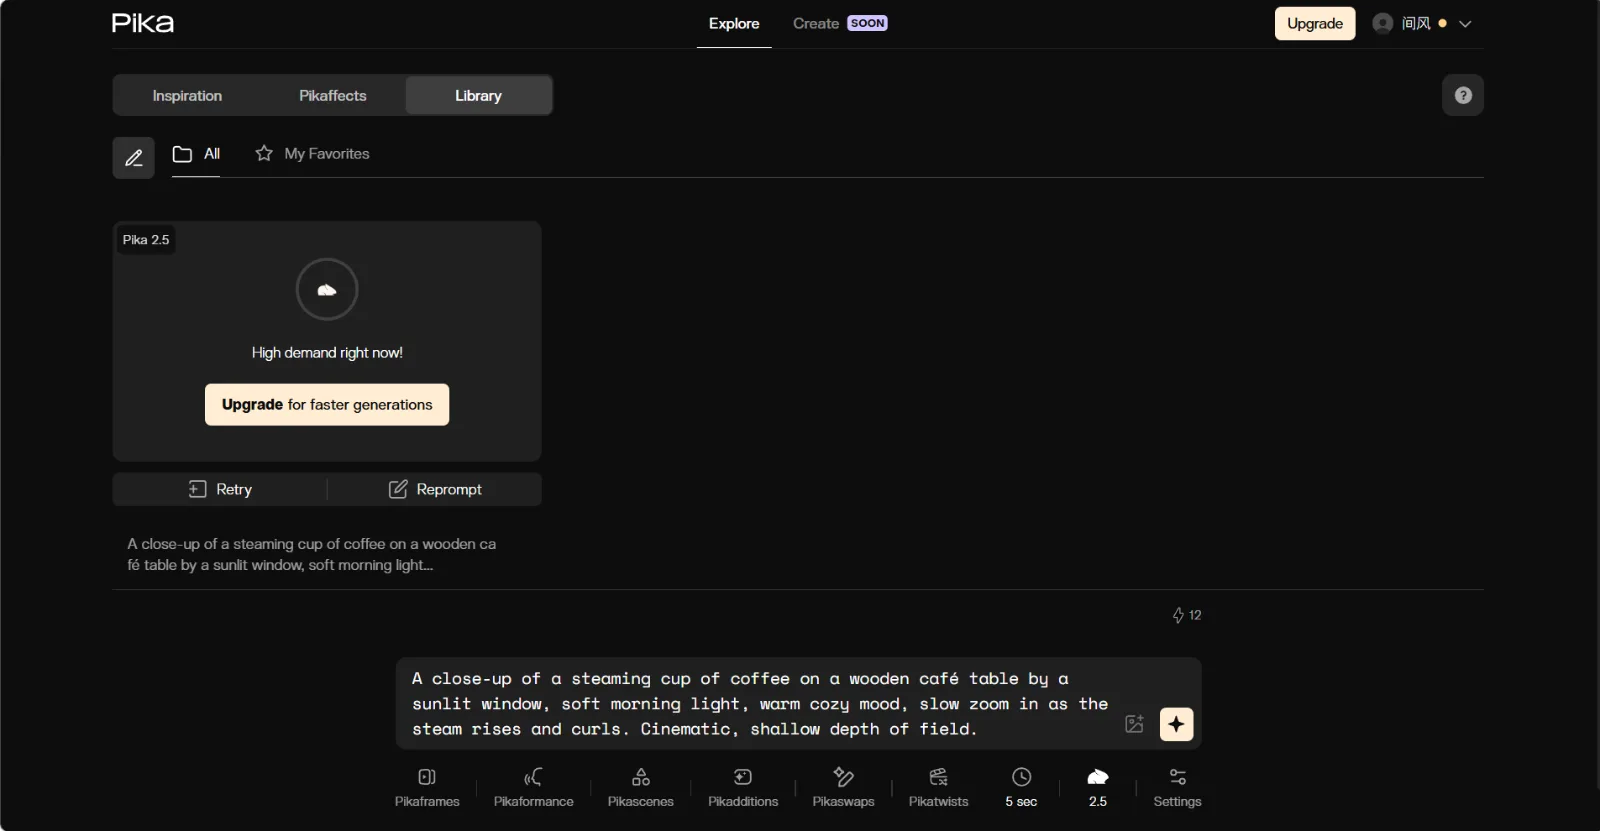
Type your description into the box in plain, specific language: the subject, the setting, the mood, and any motion you want. To animate a photo instead, click the image icon in the box, upload your picture, and add a short line describing how it should move. The more concrete you are about the action ("a close-up of a steaming cup of coffee, slow zoom in as the steam rises"), the closer the first result lands. Press the send button when it is ready.
 A specific, action-led prompt gives Pika a clear target to generate against.
Step 3: Set Resolution, Aspect Ratio, and Duration
The toolbar under the box holds your output controls. Use the duration chip (it shows "5 sec") to set clip length, and check the model chip (it shows "2.5") to confirm you are on the current Pika 2.5 engine. Open Settings (the gear on the right) for Resolution, where you pick 480p, 720p, or 1080p, and Aspect ratio, with named presets: Instagram story for 9:16 (TikTok, Reels, Shorts), YouTube for 16:9, or Instagram post for 1:1. Start at 480p or 720p to test cheaply, then switch to 1080p for the final render.
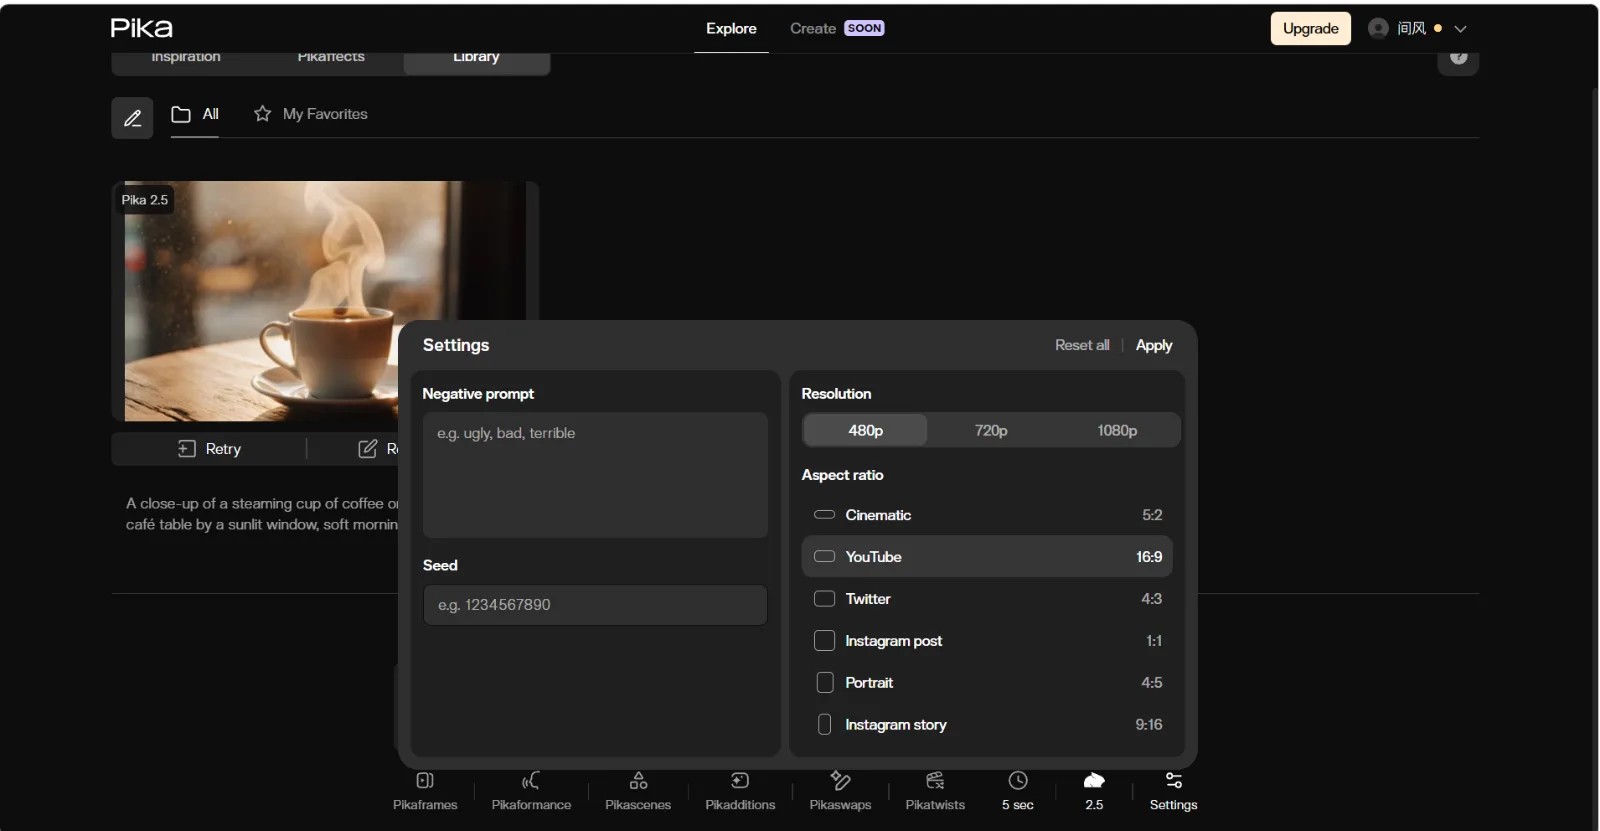 Resolution and named aspect ratio presets live in the Settings panel. Match them to your platform before rendering.
Step 4: Generate and Review in Your Library
Send the prompt and the generation lands in your Library. At busy times Pika may queue it, so give it a moment. When the clip is ready, play it back and judge it against your prompt: did it get the subject, the motion, and the framing right? If something is off, click Reprompt to tweak the wording, or Retry to re-run the same prompt. Most good Pika results come from two or three small iterations, not one perfect prompt.
 Finished clips collect in your Library, each with Retry and Reprompt controls.
Step 5: Add Effects and Download
Once you have a clip you like, the toolbar tools can push it further. Pikaffects apply stylized motion and visual effects, Pikaframes lets you set a start and end image so Pika fills in the motion between them, and tools like Pikadditions and Pikaswaps add or replace objects in the shot. When the clip is final, open it and use the download icon above the player to save the file for posting.
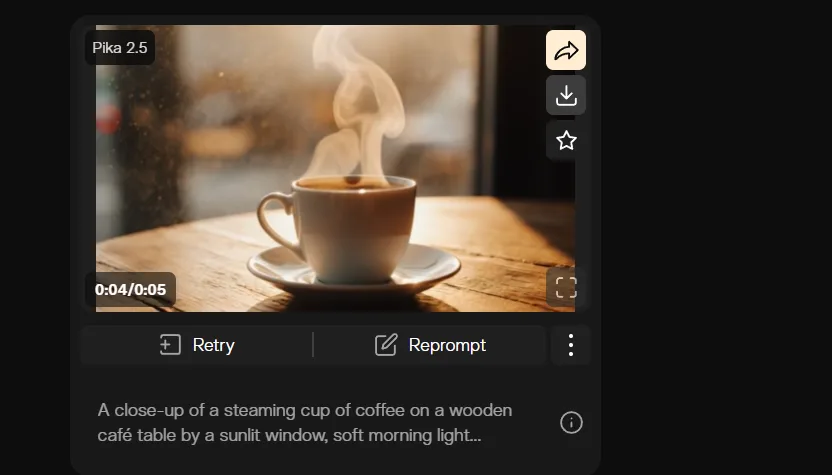 Play the finished clip, then use the download icon to save it. The toolbar tools add effects like Pikaffects and Pikaframes.
Common Pika Mistakes (and How to Fix Them)
A few errors come up again and again. Avoiding them saves credits and re-rolls.
- Vague prompts. "A nice city video" gives Pika nothing to aim at. Name the subject, the time of day, the camera move, and the mood.
- Asking for too much in one clip. Complex multi-action scenes drift. Break a story into short shots and generate them separately.
- Wrong aspect ratio. Generating 16:9 for a Reel means cropping later and losing the edges. Set the ratio in Step 3, before you render.
- Burning free credits on big jobs. Test your idea at 720p and a short duration first. Only move to 1080p once the prompt is dialed in.
Pro Tips for Better Pika Videos
These habits separate a usable clip from a throwaway one.
- Treat camera direction as part of the prompt. Pika 2.5 reads pans, zooms, and tracking shots as first-class instructions, so write them in.
- Start image-to-video from a clean, high-resolution still. Animation amplifies whatever is in the source, including noise and artifacts.
- Keep shots short and stitch later. Several tight three-to-five-second clips edit together better than one long, wandering generation.
- Plan your captions downstream. Pika makes the motion; add captions and a soundtrack in a free editor like CapCut to finish the post.
The Easier Alternative: Make the Same Video Just by Talking
Pika is powerful, but the workflow above is still a workflow: you write prompts, manage settings, read what each model wants, and re-roll until it clicks. If that friction is the part you wanted to avoid, Pexo takes a different path. No prompts. Just talk.
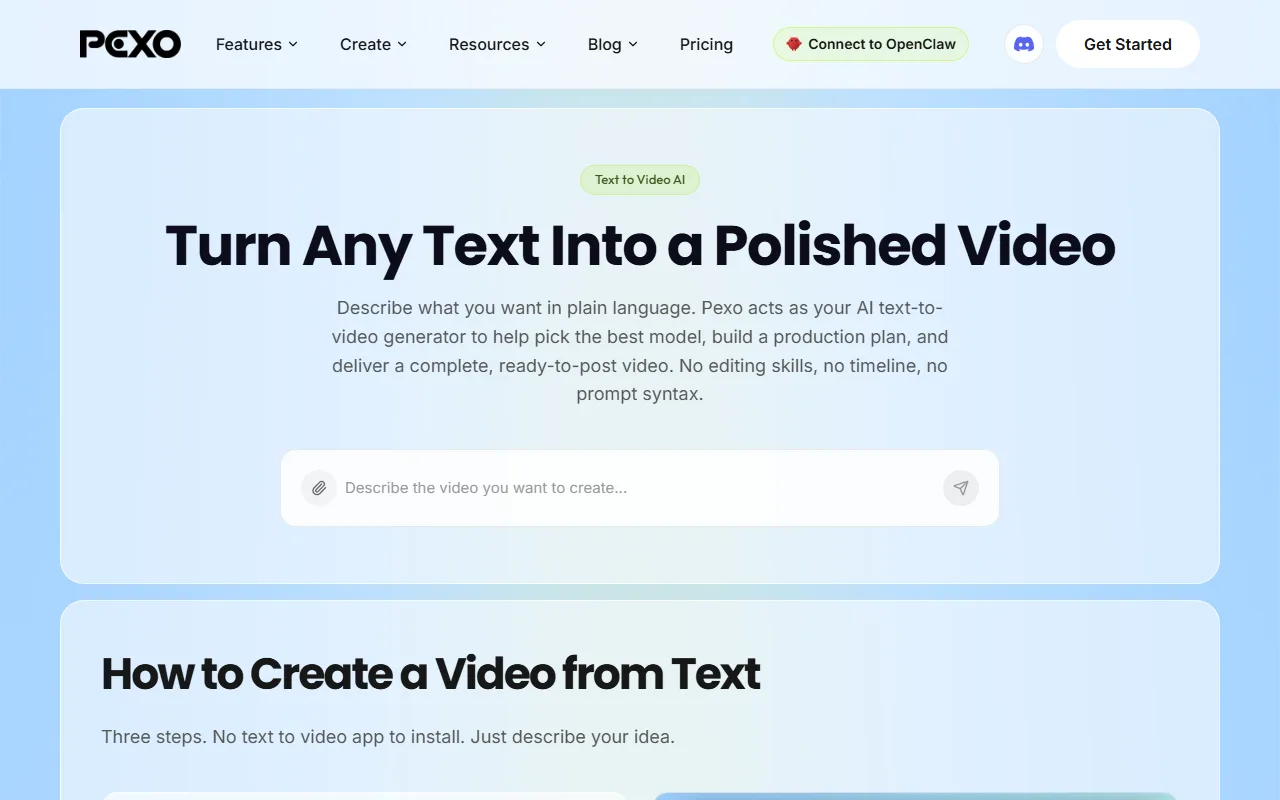 In Pexo you describe the video in one line instead of engineering a prompt and tuning settings.
Pexo is an AI video partner, not a prompt box. Instead of writing prompts and tuning settings, you describe what you want the way you would text a friend, then shape the result by talking back to it. For a text idea, you just describe it in plain language. To animate a photo, you bring a still image to life by saying how it should move, the same job as Pika's image-to-video, without the settings panel. The trade is control: you give up Pika's frame-by-frame knobs in exchange for speed, so if you want to hand-tune every parameter, Pika still fits better.
The other difference is models. Pika renders on its own engine; Pexo works with the best model for the shot across Seedance, Kling, and more, and picks the right one for your scene so you never have to. No choosing models. Just the best one, every time. If your goal is a finished social clip rather than a craft session, that is the shorter road.
What Else Can You Use
Pika is not the only generator, and the right fit depends on your project.
- Runway: A deeper toolkit aimed at filmmakers and pros, with more granular control and a steeper learning curve. If you want to compare the two directly, we put them side by side in our Pika vs Runway breakdown.
- Kling: Strong on realistic human motion and longer takes, popular for cinematic and character-driven shots. A good option when physical realism matters more than speed.
Conclusion
Making an AI video in Pika comes down to five steps: pick a mode, describe your shot or upload your image, set the output, generate and re-roll, then add effects and export. Nail your prompts and your aspect ratio and you can turn an idea into a postable clip in minutes. And if the prompt-and-settings loop is more effort than you want, you can make a social video just by describing it to Pexo. Either way, the gap between an idea and a finished video has never been smaller.