Most AI video generator tutorials open the same way: here is a blank prompt box, now type the perfect description and hope for the best. Pexo does the opposite. It is an AI video partner you talk to in plain language, and it handles the part other tools leave to you: reading what you actually mean, picking the right model, and returning a finished video.
That matters because the hard part was never the rendering. It was figuring out what to say and how to say it. This guide is written for first-timers, marketers, and creators with zero editing skills. To keep it honest, we ran the whole thing on a real product ad, a perfume brand called Daybreak, and screenshotted each step, including the moment Pexo stopped to ask us a question. By the end you will know how to turn an idea and a photo into a finished video in four steps, with no prompt engineering and no timeline.
 Pexo is the AI video partner you talk to instead of operate.
What You Need Before You Start
You need less than you think. There is no software to install, no footage to shoot, and no editing background required. Pexo runs in the browser and inside tools you may already use, like Slack and Lark.
Here is the short checklist before you begin:
- A clear idea of the video you want. Even one rough sentence works ("a 15 second ad for my coffee brand, warm and cozy"). You do not need a script.
- One starting asset, if you have it. Pexo can begin from text, an image, a product URL, or an audio clip. A product photo or a landing page link gives it more to work with, but plain text is enough.
- A target platform in mind. Knowing whether the clip is for TikTok, an Instagram Reel, or a YouTube short helps you pick the right shape later.
That is it. If your idea is still fuzzy, that is fine. A half-formed concept is a normal starting point here, because you refine it in the conversation as previews come back, rather than getting it perfect before you type a word.
AI Video Generator Tutorial: 4 Steps From Idea to Finished Video
This is the core workflow. Each step happens inside one Pexo conversation, so you never switch tabs or export between stages. The whole thing reads less like operating a tool and more like briefing a capable teammate.
Step 1: Open Pexo and Describe Your Idea
Open Pexo and tell it what you want in your own words. There is no prompt syntax to learn and no settings panel to configure first. Pexo's text to video workflow starts from plain language, so you type the way you would text a colleague. Here is the exact brief we sent:
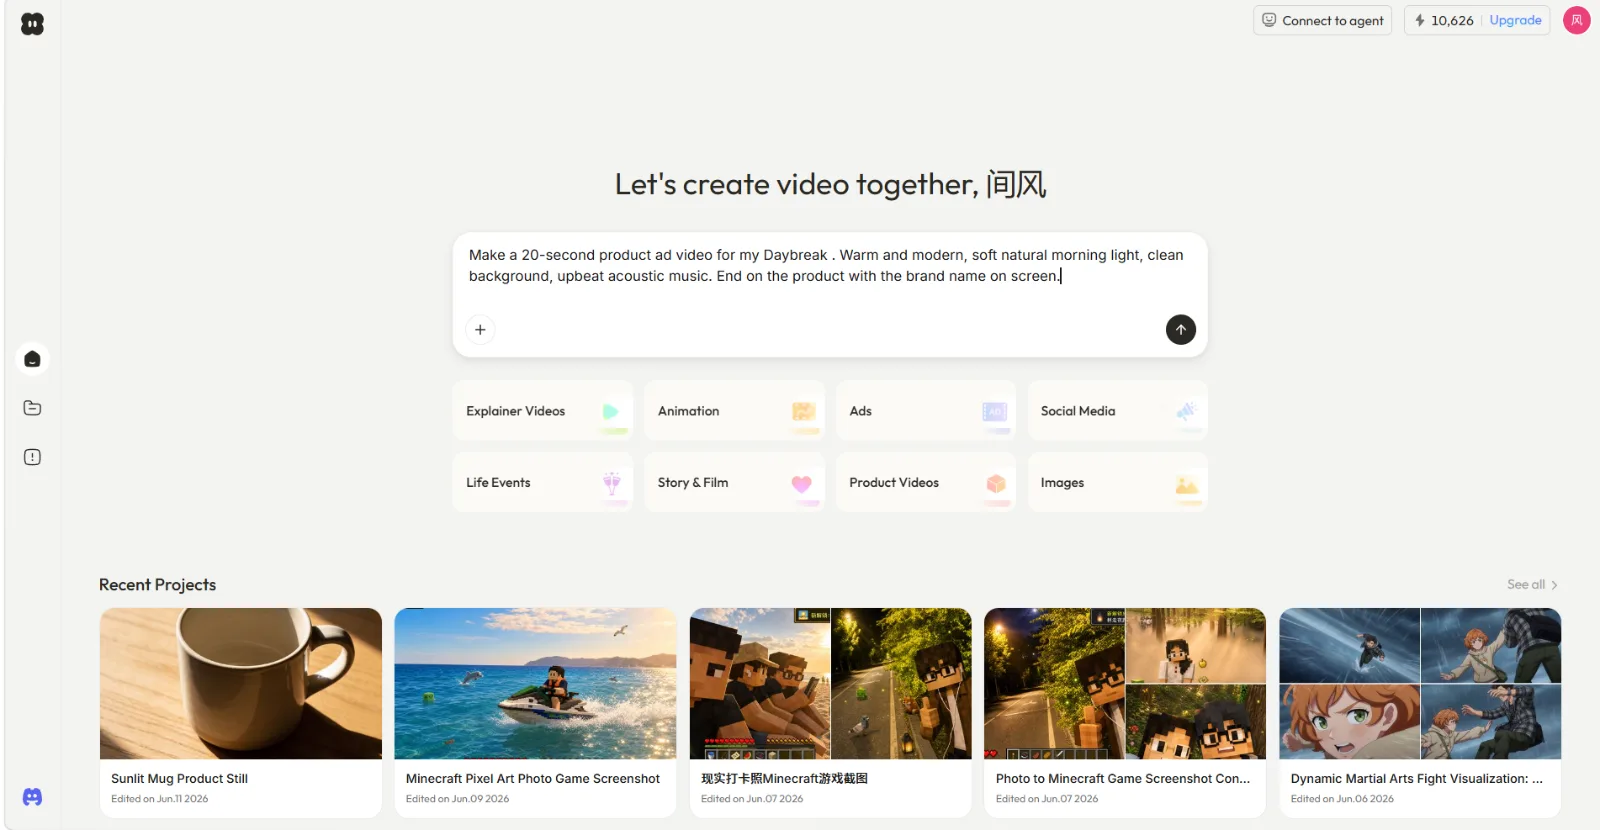 We opened Pexo and typed the brief straight into the box, then picked the Ads direction.
"Make a 20-second product ad video for my Daybreak. Warm and modern, soft natural morning light, clean background, upbeat acoustic music. End on the product with the brand name on screen."
Pexo read the intent and did not just start rendering. It first asked a clarifying question, what kind of product Daybreak was and whether we had an image to use, then planned the ad before building anything. That back-and-forth is the point. Most generators leave you alone with a blank field, while Pexo treats the brief as a conversation.
Step 2: Add Your Asset (Photo, URL, or Script)
We answered Pexo's question by handing it a photo. Drop your asset into the same chat: Pexo's image to video workflow takes a still and builds motion around it, so a clean product shot anchors the visuals. We sent the perfume bottle with one line, "Use this photo as the hero product shot," and Pexo got to work.
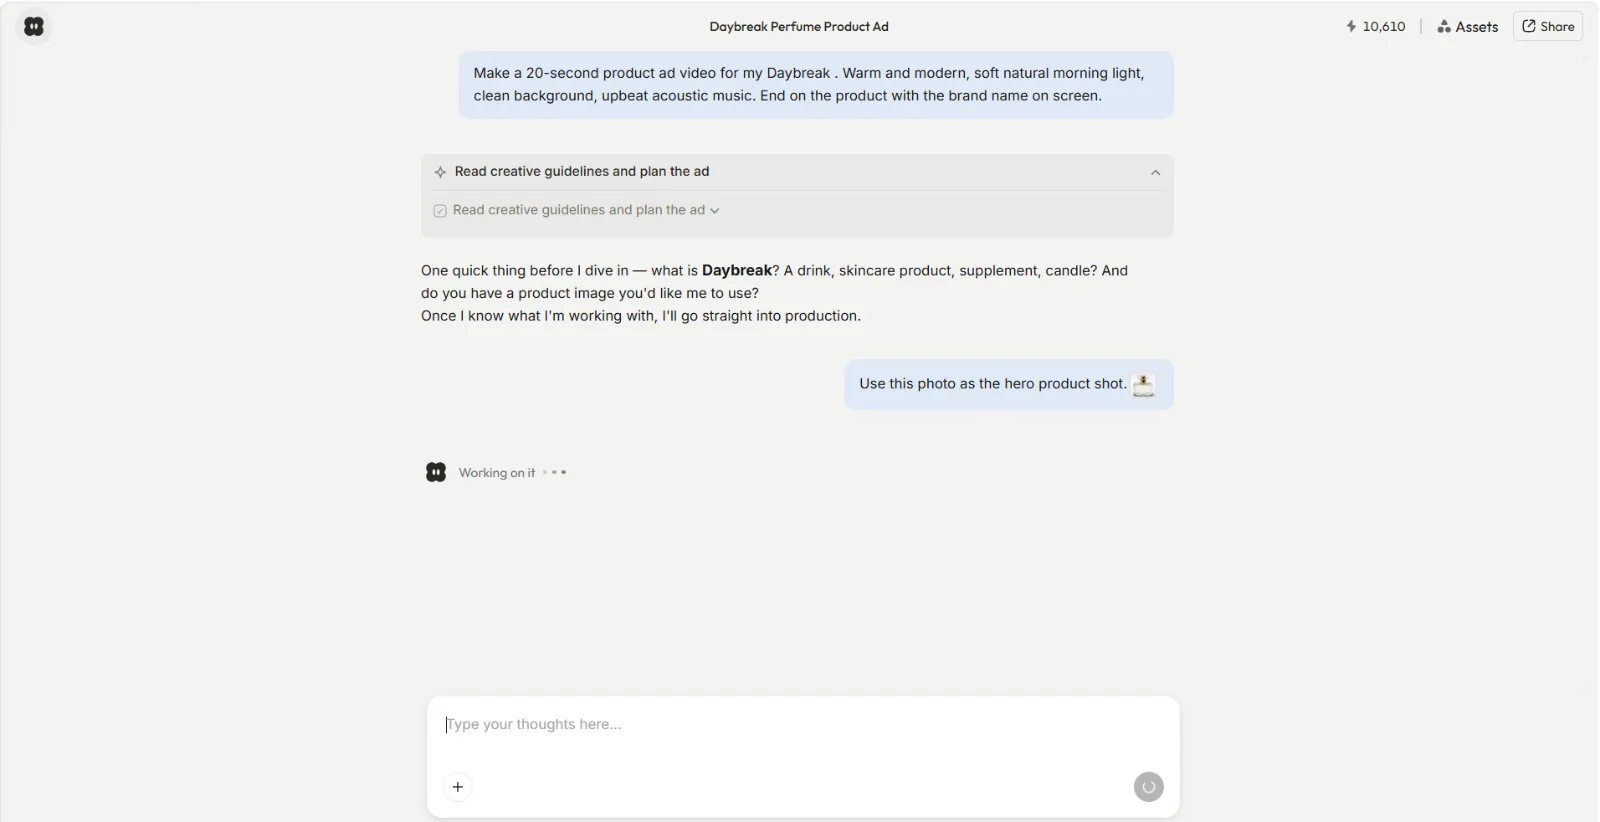 Pexo asked what Daybreak was and for an image, then started production once we sent the bottle photo.
No photo on hand? You do not need to leave for a separate design app. You can generate the still image inside Pexo first, then carry it into the video without breaking your flow. You can also paste a product page URL for Pexo to pull details from, or hand over a script you already wrote.
Step 3: Review Pexo's Preview and Direct the Changes
Pexo shows its plan and a preview before committing, so there is no black box, and it ends each result by asking what you want to change. On our run it offered to adjust the pacing, the end-card style, the music tone, or any individual shot.
So if something is off, do not hunt for an editor. Point at what you want different and say it: "make the opening brighter," "swap the music for something calmer," "cut the last scene." Pexo applies the direction and shows you the updated take, and you can jump back to earlier choices whenever you change your mind. You direct, Pexo produces.
Step 4: Export Your Video and Post It
When the result looks right, you have a complete clip, not a raw five-second fragment to assemble yourself. Our Daybreak ad came back as a finished 20-second vertical video in 9:16, built in three beats: soft morning light through curtains, the bottle catching warm golden light as a hand lifts it, then a slow pull-back to a clean hero shot with the Daybreak name. An upbeat fingerpicked acoustic guitar ran underneath and faded out on the last frame.
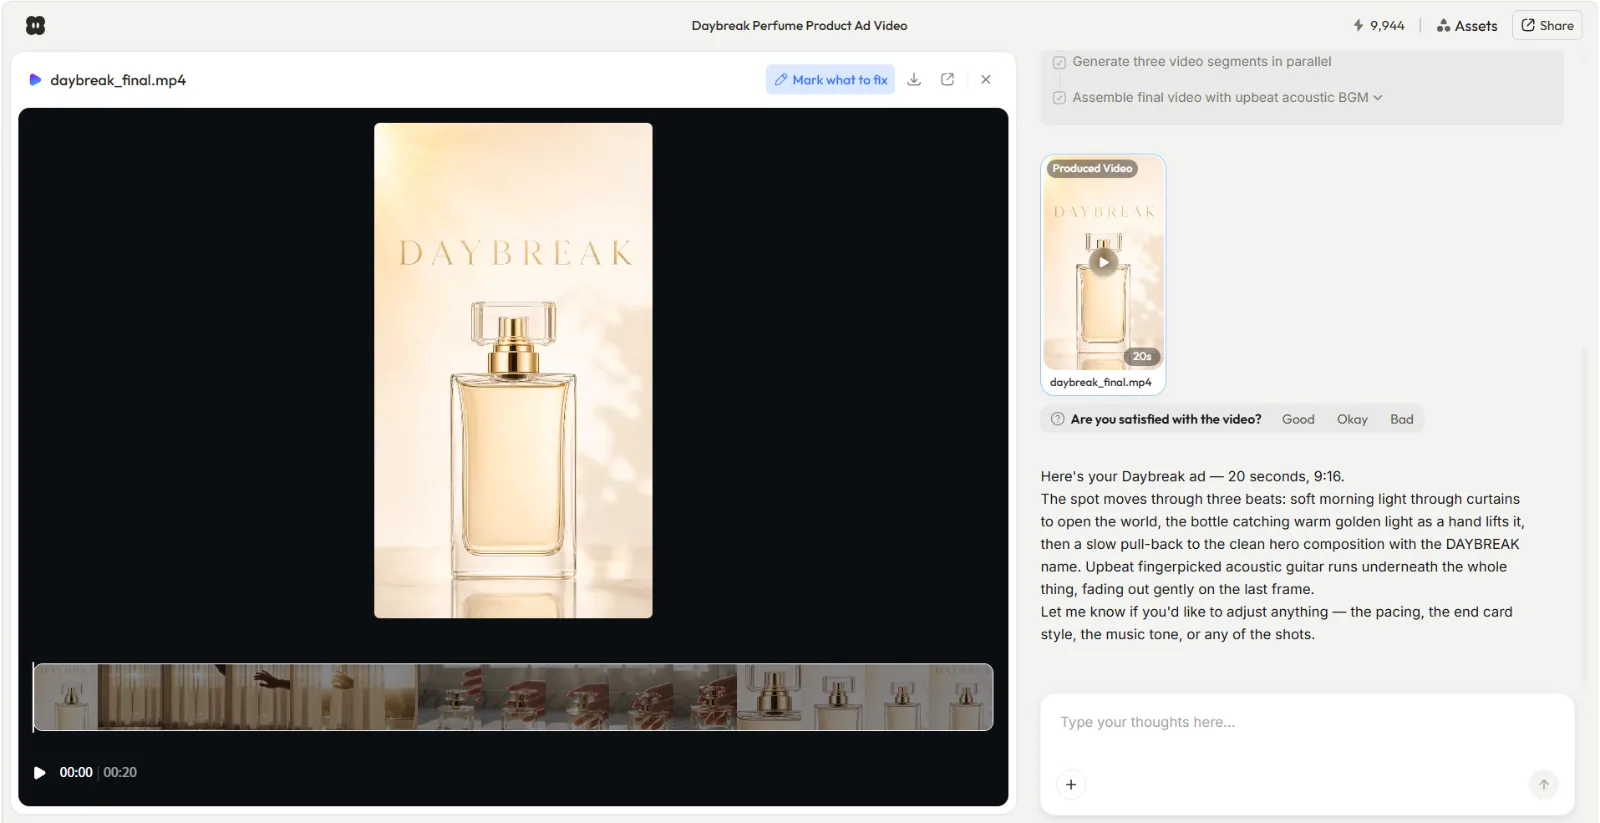 The finished 20-second ad, with transitions, pacing, and soundtrack already handled.
Ask Pexo for the download and post it where it is going. Ours saved as a standard MP4 (the file came down as daybreak_final.mp4), and because we chose the vertical shape in the conversation, it arrived ready for the feed. Upload it to your platform the same way you would any other clip.
Common Mistakes Beginners Make
A few habits carry over from older tools and quietly hurt your results. Watch for these:
- Over-engineering the first message. People assume they need a dense, technical prompt. With Pexo the opposite is true. A natural sentence about the vibe and goal works better than a wall of comma-separated keywords.
- Giving feedback all at once. Dumping ten changes in one message muddies the result. Direct one or two changes at a time and review the preview between rounds. You will land where you want faster.
- Skipping the preview. The preview exists so you can catch a wrong tone or pacing early. Rushing straight past it and hoping the render is perfect wastes a cycle.
- Ignoring the platform shape. A square video crammed into a vertical feed looks off. Decide the format up front so the clip fits where you will post it.
Pro Tips for Better AI Video Generation
Once the basics click, these habits sharpen the output:
- Describe the feeling, not just the facts. "Cozy, slightly nostalgic, soft morning light" gives Pexo more to work with than "a video of coffee." Tone words steer the whole mood.
- Let Pexo handle the model choice. You do not pick the engine. Pexo works with leading models like Kling, along with Seedance and more, and routes each job to the one best suited for your scene and style. In our run we never opened a model picker; Pexo selected and routed on its own. For a beginner that removes a real point of paralysis, which generator to use for which shot.
- Prep your source assets. If a product photo has a busy background, clean it up with a tool like Remove.bg before you bring it in. Better inputs, better motion.
- Match the export to the channel. Vertical for TikTok and Reels, wider for YouTube. Plan the aspect ratio in the conversation rather than cropping afterward.
Other AI Video Generators You Can Try
Pexo is the fastest path from a rough idea to a finished video, but it is not the right tool for every job. It generates a video from scratch, so if your task is to trim, re-cut, or add captions to footage you already filmed, a timeline editor will serve you better. It is also still finding its feet on long-form, multi-scene narratives, where you may want tighter shot-by-shot control. With that said, here are a few alternatives that take different routes:
- Runway leans toward creators who want granular, shot-level control and are comfortable steering each generation closely. Good when fine manual control matters more than speed.
- Synthesia centers on AI avatars and talking-head presenters, which fits training videos and corporate explainers built around a spokesperson.
- Pika is built for fast, playful short clips and quick creative experiments where polish matters less than turnaround.
Each is a fair pick depending on the job. Pexo's edge is the conversational, generate-from-scratch flow: you bring an idea, not a timeline.
Conclusion
Making an AI video does not have to start with a blank prompt box and a guess. With Pexo you describe the idea, add an asset if you have one, review the preview, and export. Four steps, one conversation, a finished clip at the end. When you are ready to make your first one, start creating with Pexo and talk your way to a video.