 This guide walks through Luma AI step by step, then shows the one-conversation version of the same job in Pexo.
I wanted a short product ad clip last week, so I made one twice: once in Luma AI and once in Pexo. Luma got me there in about ten minutes of prompting and tweaking. Pexo got me there by reading one sentence I typed like a text message. This Luma AI tutorial covers both, because the fastest way to learn a tool is to see exactly where it shines and where a simpler path beats it. If you are a creator, marketer, or small-business owner who just wants a usable clip without learning a timeline, you are in the right place.
Below, you will get the real Luma Dream Machine workflow first, with the exact steps and the spec numbers that matter, then the no-prompt Pexo route for when you would rather just say what you want and get a finished video back.
What Is Luma AI (Dream Machine)?
Luma AI is the company behind Dream Machine, a text-to-video and image-to-video generator that Luma Labs launched in June 2024. You type a prompt or drop in a still image, and Dream Machine generates a short cinematic clip from it. It became popular fast because the early model produced smooth camera motion and believable physics at a time when most generators still looked rubbery.
Dream Machine is powered by Luma's Ray model family, and the version matters because the tool's limits change with it:
- Ray2 (March 2025) added the three features most tutorials focus on: Keyframes, Extend, and Loop.
- Ray3 added HDR-quality color, stronger character and scene consistency frame to frame, and a Modify mode for video-to-video edits.
- Ray3.14 (released January 26, 2026) produces native 1080p across the core workflows, runs about 4x faster than the original Ray3 at 720p, and costs roughly 3x less per generation at 720p.
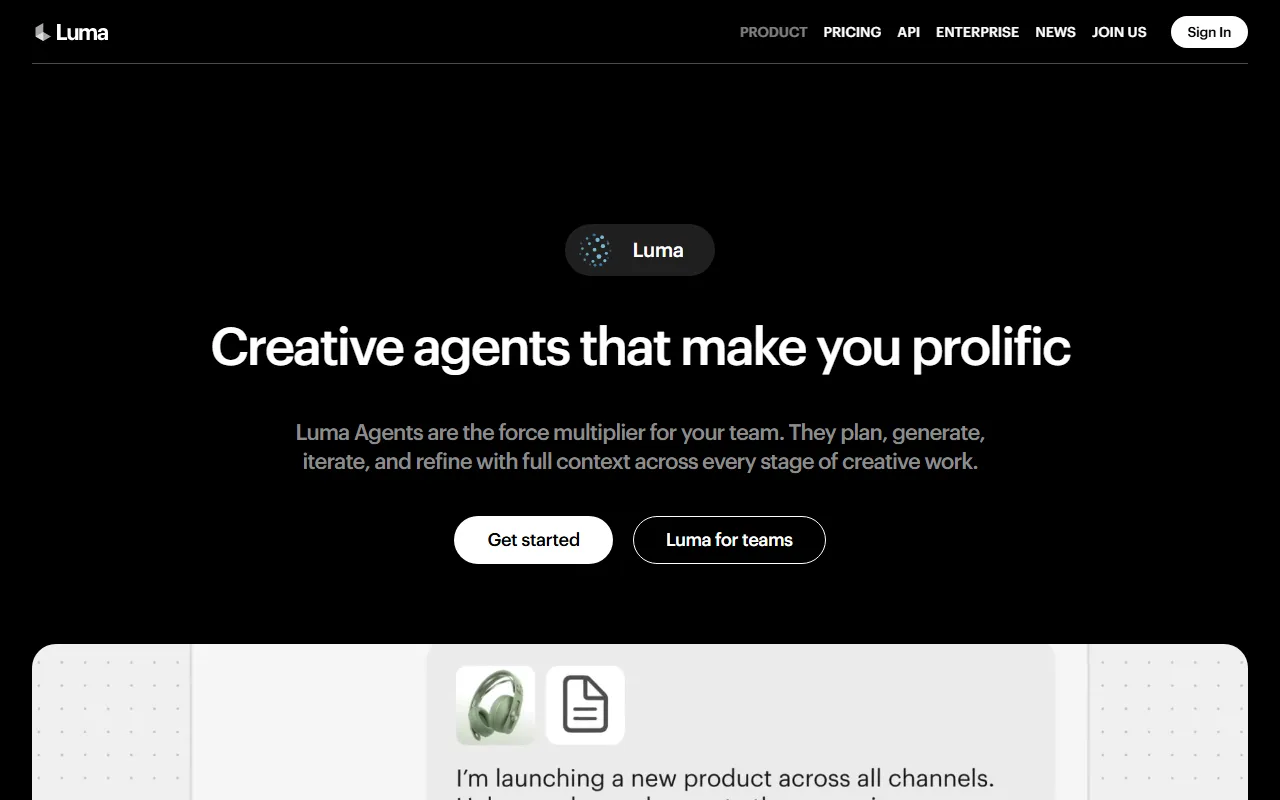 Luma positions Dream Machine inside its broader "creative agents" product, but the video generator is what most people come for.
Clips start at around 5 seconds and you stretch them with Extend. Luma offers a limited free tier with a small daily credit allotment, plus paid plans that start around $30/month as of mid-2026 (tiers and prices change, so check Luma's pricing page for the current ladder). If you are weighing it against other options, Pexo also keeps a Luma AI alternatives breakdown that covers the trade-offs in depth. Prefer to skip the prompt box entirely? Try the one-conversation route in Pexo and come back to compare.
What You Need Before You Start
You do not need much to follow this Luma AI tutorial:
- A free Luma account (sign up with a Google account at lumalabs.ai).
- A modern browser. Dream Machine runs in the browser, so there is nothing to install.
- Your raw material: either a written idea for text-to-video, or a clean still image (a product photo, a character render, a landscape) for image-to-video.
- A few credits. The free tier is enough to test one or two short clips per day; heavier work needs a paid plan.
If you do not have a starting image yet, you can generate one first. Pexo can make the still for you at text-to-image and then carry it straight into video, so you never leave one workspace to find a photo.
How to Use Luma AI: Step by Step
Here is the full Luma Dream Machine workflow, one clear action per step.
Step 1: Sign In and Pick a Mode
Open lumalabs.ai, sign in, and open Dream Machine. The main screen puts a prompt field front and center with a mode selector above it: Text to Video, Image to Video, and a video-modify option. Pick your mode before you do anything else, because the input field changes with it. Choose the Ray version too (Ray3.14 is the current default and the fastest, cheapest, and sharpest at 1080p).
Step 2: Generate a Text-to-Video Clip
In Text to Video, write a prompt that names the subject, the action, the setting, and the camera move. A vague line like "a car driving" gives you a generic result; "a red sports car drifting around a wet mountain bend at dusk, low tracking shot, cinematic" gives Ray3.14 enough to work with. Hit generate and wait for the 5-second clip. This is the luma ai text to video core loop, and most of your quality comes from how specific the prompt is.
Step 3: Generate an Image-to-Video Clip
For luma ai image to video, switch to Image to Video and upload your still. Add a short prompt describing the motion you want ("slow push in, leaves drifting, soft morning light"). Dream Machine animates the photo while trying to keep the original composition intact. This mode is the one product sellers use most, since you can start from a real product photo instead of a generated scene.
Step 4: Use Keyframes, Extend, and Loop
These Ray2-era tools are where Luma gets powerful:
- Keyframes: set a start image and an end image, and Ray generates the transition between the two. Great for controlled morphs and predictable motion.
- Extend: take a finished 5-second clip and push it longer, continuing the motion from the last frame.
- Loop: blend the clip's end back into its start for seamless infinite playback, handy for backgrounds and social loops.
Step 5: Export and Download
When you like a clip, open it and use the download control on the clip itself (the keyboard save shortcut, Cmd+S on Mac or Ctrl+S on Windows, won't grab the video). The file lands in your Downloads folder as a standard MP4. Remember that on the free tier your daily credits cap how many generations you get, and there is no rollover, so plan your prompts before you burn the budget.
That is the complete Luma AI tutorial. It works, and the output can look genuinely cinematic. The catch is the part nobody puts in the title: you are doing prompt engineering, mode switching, model picking, and credit math to get there. Here is the version where you do none of that.
The Faster Way: Make the Same Video in Pexo (One Conversation)
Pexo is an AI video partner you talk to instead of operate. The pitch is simple: No prompts. Just talk. Where Luma hands you a prompt box and a model menu and asks you to figure it out, Pexo reads how you naturally describe an idea and does the production thinking with you. I made the same product ad in three steps and never touched a prompt field.
Step 1: Describe What You Want
Open Pexo and type what you are picturing the way you would text a friend: "Make a 20-second product ad video for my Daybreak perfume. Warm and modern, soft natural morning light, clean background, upbeat acoustic music. End on the product with the brand name on screen." No prompt syntax, no keyword stuffing, no mode to select first. Pexo picks up on intent, not just the literal words, so a half-formed idea still gets you moving. You can start creating in Pexo for free and try this with your own product right now.
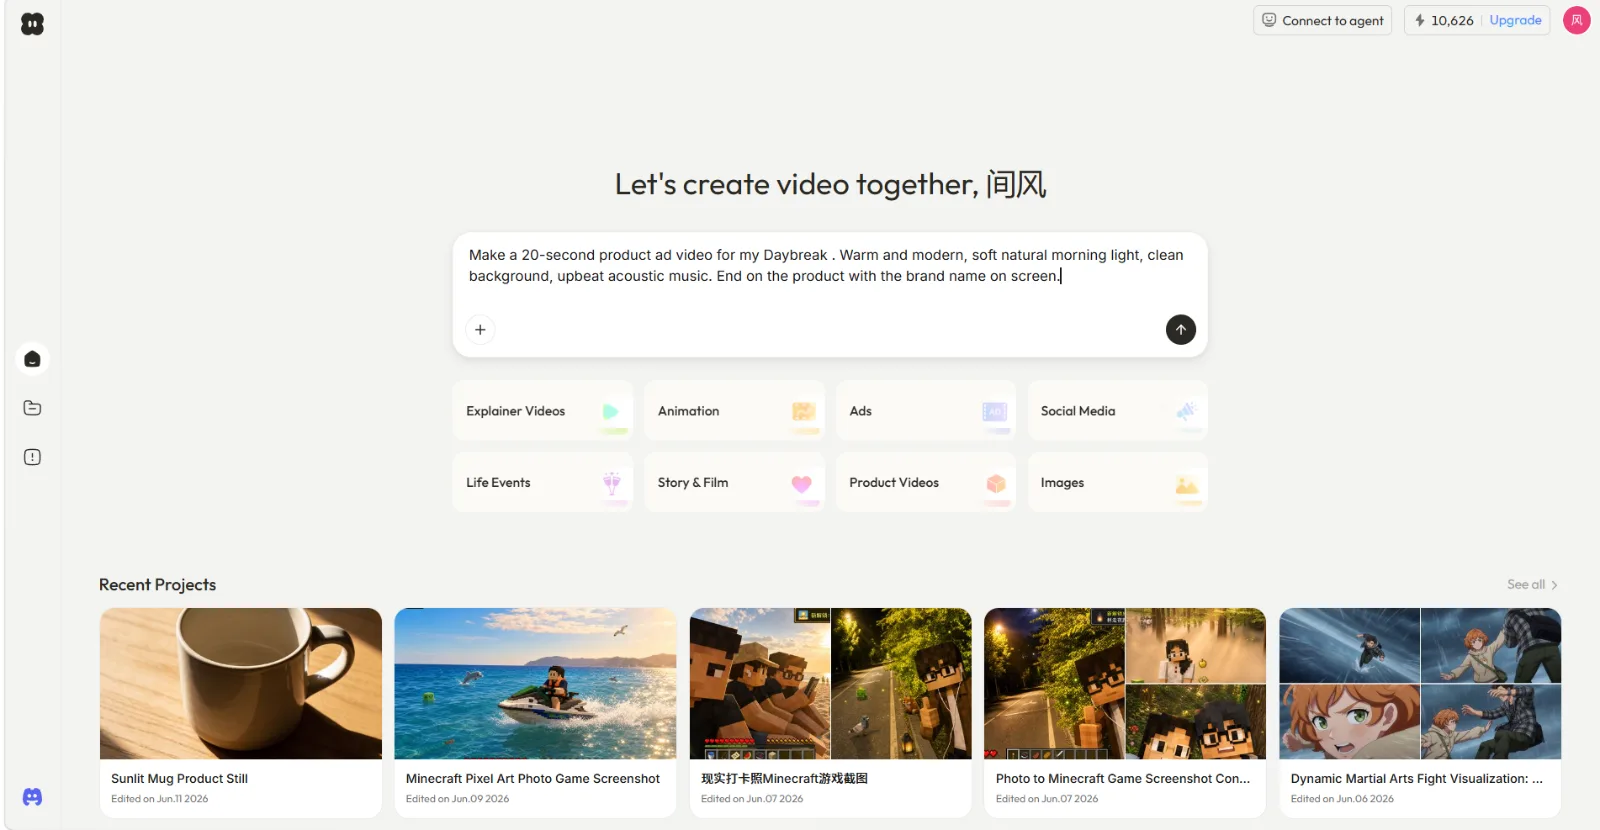 Instead of a prompt box and a model menu, Pexo opens on one line: describe the video you want, in plain language.
Step 2: Review the Plan and Preview
Before any full render, Pexo shows you its plan and asks the right questions first. In my run it read the brief, then checked back: "what is Daybreak, and do you have a product image you'd like me to use?" I sent the bottle photo and it went into production. This is the opposite of Luma's "generate and pray" loop, where you spend a credit, wait, and only then learn the prompt missed. Want a different vibe or pace? Just say so in the same chat.
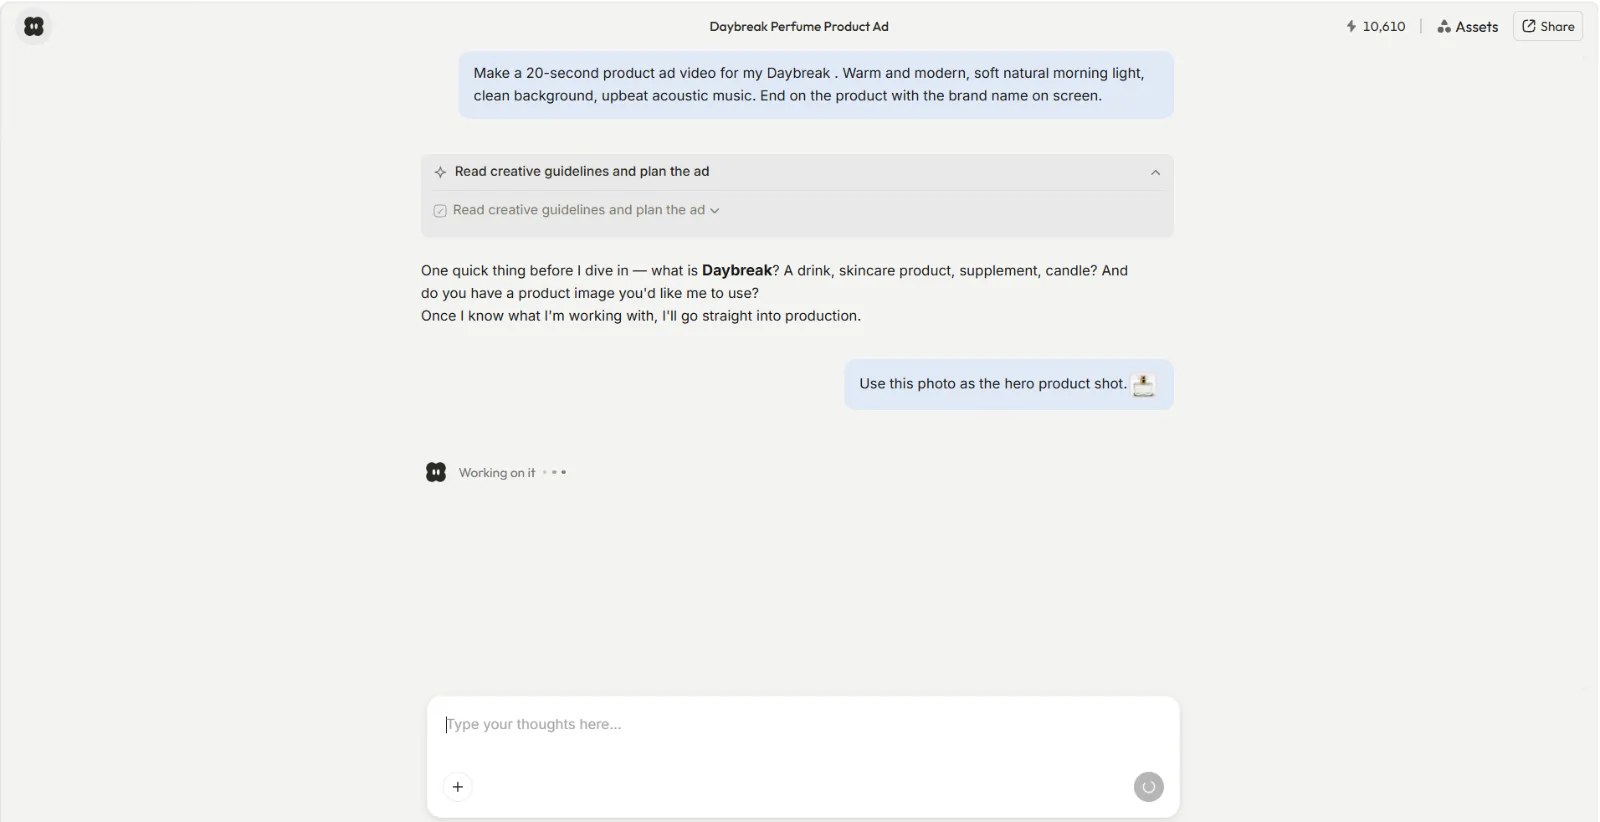 Pexo plans the ad and asks a clarifying question before spending anything, then takes the product photo straight into production.
Step 3: Shape It and Ship It
When the first cut came back, Pexo handed me a finished 20-second 9:16 ad with transitions, an acoustic soundtrack, and the brand name on the closing frame, then asked if I wanted to adjust the pacing, the text card, or the music. Point at what you want changed and describe it ("make the opening punchier, swap the music for something calmer"), and Pexo adjusts. There is no timeline to learn and no editor to open. One conversation in, a ready-to-post clip out.
 The finished 20-second ad, delivered in the chat with a recap and one-line options to refine it further.
The other quiet win is models. Luma asks you to choose Ray2, Ray3, or Ray3.14 and understand the difference. Pexo follows the principle of No choosing models. Just the best one, every time. It works with Seedance, Sora, Kling, and more, and routes your request to whichever model fits the scene. If you like to see the engines under the hood, the model pages lay them out, but you never have to pick. You can also turn a single photo into a clip in Pexo the same way, no mode switching required.
| Luma AI (Dream Machine) | Pexo | |
|---|---|---|
| How you create | Prompt box + mode selector | One natural-language conversation |
| Models | You pick Ray2 / Ray3 / Ray3.14 | Auto-routed to the best fit |
| Inputs | Text, image, video | Text, image, URL, audio |
| Editing | Keyframes, Extend, Loop (manual) | Describe the change, no timeline |
| Output | 5s clips, native 1080p (Ray3.14) | Finished, ready-to-post video |
| Learning curve | Moderate (prompting + tools) | None (just describe it) |
| Pricing | Free tier + paid from ~$30/mo | Free to start, credit-based |
| Best for | Frame-level cinematic control | Going from idea to finished clip fast |
Common Mistakes to Avoid
A few traps catch almost everyone the first week:
- Writing prompts that are too vague. "A dog running" wastes a credit. Name the breed, the setting, the light, and the camera move. (In Pexo this matters far less, since it asks clarifying questions when your description is thin.)
- Using the wrong mode. People upload a still in Text to Video and wonder why it is ignored. Switch to Image to Video first.
- Ignoring Keyframes. If you need a specific start and end, do not re-roll the prompt ten times. Set two keyframes and let Ray fill the gap.
- Fighting the prompt box at all. If you keep rewording and re-rolling, that is a signal you want to describe a result, not engineer one. Pexo's conversational route is built for exactly that.
Pro Tips for Better Results
- Lead with the camera move. Ray responds strongly to "slow dolly in," "orbit," "low tracking shot." It sets the cinematic feel faster than adjectives do.
- Start from a real photo for product work. Image-to-video off a clean product shot beats text-to-video for accuracy nearly every time.
- Use Extend for pacing, not length alone. Generate a tight 5-second core, then Extend only the beats that need room to breathe.
- Keep a prompt log. Note which phrasings landed so you are not re-discovering them next week.
- When the idea is still fuzzy, talk it out instead of prompting. Describe it to Pexo and let it propose directions; you will often find the angle you were missing before you have spent a single render.
When NOT to Use Luma AI
Being honest about fit is the fastest way to save yourself an afternoon. Neither Luma nor Pexo is the right call in a few cases:
- You already have footage and just want to cut it. If your job is clipping a long video, repurposing a podcast, or trimming a recording on a timeline, you want an editor or a clip tool, not a generator. Generators make video from text and images; they do not ingest your existing footage and chop it.
- You need frame-perfect manual control over every element. For VFX-grade compositing or exact hand-placed transitions, a traditional editor still wins.
- You only need still images. Then a dedicated image workflow (including Pexo's text-to-image) is the shorter path.
Luma is strongest when you want hands-on cinematic control over a generated clip. Pexo is strongest when you want to go from a messy idea to a finished, postable video without operating anything. Match the tool to the job and both get easier.
What Else Can You Use
If Luma and Pexo are not quite the fit, two other directions are worth a look:
- Runway is the other heavyweight for prompt-driven cinematic generation with deep manual controls; see how it stacks up in this Luma AI vs Runway comparison.
- Kling AI is strong on realistic motion and longer clips; Pexo can also route to it automatically via the Kling model page.
Conclusion
Luma AI Dream Machine is a genuinely capable generator, and now you have the full workflow: pick a mode, write a sharp prompt or upload a still, use Keyframes, Extend, and Loop for control, and export your MP4. It rewards people who like to direct a clip frame by frame.
But if your real goal is just a finished video, the prompting and model picking is friction you do not need. That is the whole reason I keep coming back to Pexo: you describe what you want in one conversation, it picks the best model and handles the production, and you get a ready-to-post clip without learning a thing. Try it free and make your first clip by simply saying what you see.