

 ChatGPT
 Perplexity
 Claude
 Gemini
 Grok
Grok

How to Make an Unboxing Video
UPDATED: 2026-08-05 By Lan He, Senior Video Producer at Pexo
Making an unboxing video takes six steps: set up a clean surface and light, choose the camera angles, pace the reveal, film or generate the footage, record the packaging sound, then export with disclosure. An unboxing video takes about 20 minutes end to end.
Quick Version: How to Make an Unboxing Video
- Set up a clean surface with one soft light source.
- Set an overhead angle plus an over-the-shoulder angle.
- Pace the reveal so the opening is not rushed past.
- Film the unboxing, or generate reveal footage from a product photo.
- Record the packaging sound clearly, since it carries the format.
- Export 9:16 for social or 16:9 for YouTube, with any required disclosure.
How to Make an Unboxing Video Step by Step
Step 1: Set up the surface and light
Clear a plain surface large enough for the box and everything inside it laid out. A wooden table, a white desk, or a neutral mat all work. Busy backgrounds compete with the product and make the contents hard to read at a glance.
Use one soft light source at a 45 degree angle, or a window. Overhead ceiling lights cast hand shadows directly onto the product, which is the most common lighting failure in the format. Check the frame with your hands in position before recording, not after.
Step 2: Set the camera angles
Mount one camera directly overhead, framing the box with room around it for the contents to be laid out. This angle shows what is inside clearly and is the one that reads correctly in both vertical and horizontal exports.
Add an over-the-shoulder angle if a second camera is available. Overhead shows the product; over-the-shoulder gives the viewer the sense of opening it themselves, which is what the format sells. Cutting between the two is what separates an unboxing from a product photograph in motion.
Step 3: Pace the reveal
Slow the opening down. The most common error is treating the box as an obstacle between the viewer and the product, cutting to the item within five seconds. The anticipation is the format, and removing it turns an unboxing into a product shot.
Move through it in order: the sealed box, the opening, the first layer, the product, then the accessories laid out. Handle each item deliberately and hold it in frame long enough to be seen. For short-form, keep the whole sequence to 15 to 60 seconds; for YouTube, let it run five to twelve minutes.
Step 4: Film or generate the footage
Film the unboxing in one continuous take where possible, then cut it down. Restarting mid-unboxing produces continuity errors that are obvious in the format, since the packaging cannot be resealed convincingly.
For brand launch content rather than a personal review, Pexo's image-to-video workflow generates reveal footage from a product photo, keeping the packaging and product accurate. Use this for brand-published reveals, not for content presented as a genuine personal unboxing, where generated footage would misrepresent the experience.
Step 5: Record the packaging sound
Record the audio properly, because sound is a larger share of unboxing appeal than the visuals. Tape peeling, cardboard flexing, plastic film sliding, and the click of a rigid box lid all carry the satisfaction the format is known for.
Use an external microphone close to the surface and record in a quiet room. Keep music low or drop it entirely during the opening itself. Music mixed over the packaging sound removes the exact thing viewers came for. Pexo composes a score that sits under the audio rather than covering it.
Step 6: Export and disclose
Export 9:16 at 1080x1920 for TikTok, Reels, and Shorts, or 16:9 at 1080p for YouTube long-form. Pexo exports both from one project. Overhead footage crops cleanly to either, which is why it is the most reusable angle in the shoot.
Disclose any material connection. If the product was gifted or the video was paid for, say so on screen early rather than only in the description. This is required under FTC rules in the United States and equivalent rules elsewhere, and burying it in a caption does not meet the standard.
How to Make an Unboxing Video with Pexo
The six steps above work with any production method. Pexo generates brand reveal footage from a product photo, which suits launch content where no physical unit is available to film yet.
Open the unboxing video page, upload the product and packaging photos, and describe the reveal: "A 25-second overhead unboxing of a matte black wireless earbud case on a walnut desk, soft side light, slow deliberate hands, ending with the earbuds laid out." Pexo generates the sequence with the real product and adds the packaging sound design.
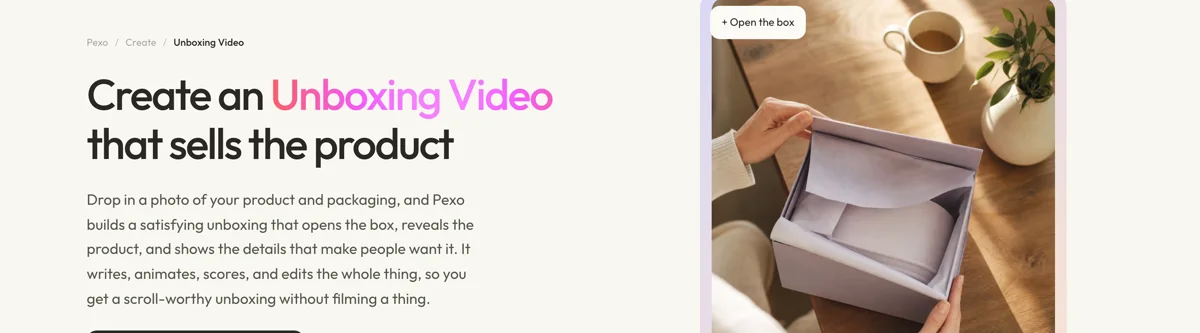
Adjust any moment by describing the change in the chat, and Pexo regenerates that scene alone. The platform runs across Seedance 2.0, Kling AI, and more.
For adjacent formats, the UGC video page covers creator-style content more broadly, and product reveal video suits a brand-side reveal without the unboxing framing.
5 Mistakes That Lose an Unboxing Audience
1. Rushing past the box. The anticipation is the format. Cutting to the product in five seconds removes the reason to watch.
2. Lighting from directly overhead. Ceiling light puts your hand shadow on the product in every shot. One soft source at 45 degrees.
3. Burying the packaging sound under music. The sound of opening is a large part of the appeal. Keep music low or off during the reveal.
4. Restarting mid-unboxing. Packaging cannot be resealed convincingly. Film it in one take and cut afterward.
5. Giving a verdict. An unboxing covers what arrived. Judgment on whether it works needs time with the product and belongs in a review.
Related Tutorials
- How to make a UGC video for creator-style brand content
- How to make a product launch video for the brand-side reveal
- How to make a recipe video for another overhead-shot format
- How to make a short video for vertical format fundamentals




